Reclaiming Sauna
Clean, Simple, Sweat
Guest post by Matthew Blome
I recently completed my sow-na. It’s built completely out of reclaimed materials. The final outcome is an embrace of the four elements: earth (brick), wind (warm air), water (löyly), and fire (well, fire)…and time.
My Sauna History
In 2007, I developed an enthusiasm for sauna during a job transition while in the Army. I was working out at lunchtime then taking sauna with some older, very friendly veterans at the gym. After moving, I built a pre-fabricated kit sauna from a supplier that provided wall, ceiling and roof sections. I built it in a couple weekends, and had an electrician wire it in. I used it 3–4 times per week for three years until I was forced to move again. The sauna made me feel great and was a huge daily rejuvenator. We also had a pool nearby that I would jump in — especially in the winter time. From then on, I craved that feeling from the heat and the endorphin rush.
Fast forward seven years. I was too busy to build another sauna, while all the time growing more and more tired of not being able to sauna when I liked. I had to travel 30 minutes in order to do so. Even then, it was just an electric, gym sauna without enough rocks or heat. Still, whenever I could, I visited and learned to enjoy a longer set of sauna sessions — sometimes up to three and a half hours.
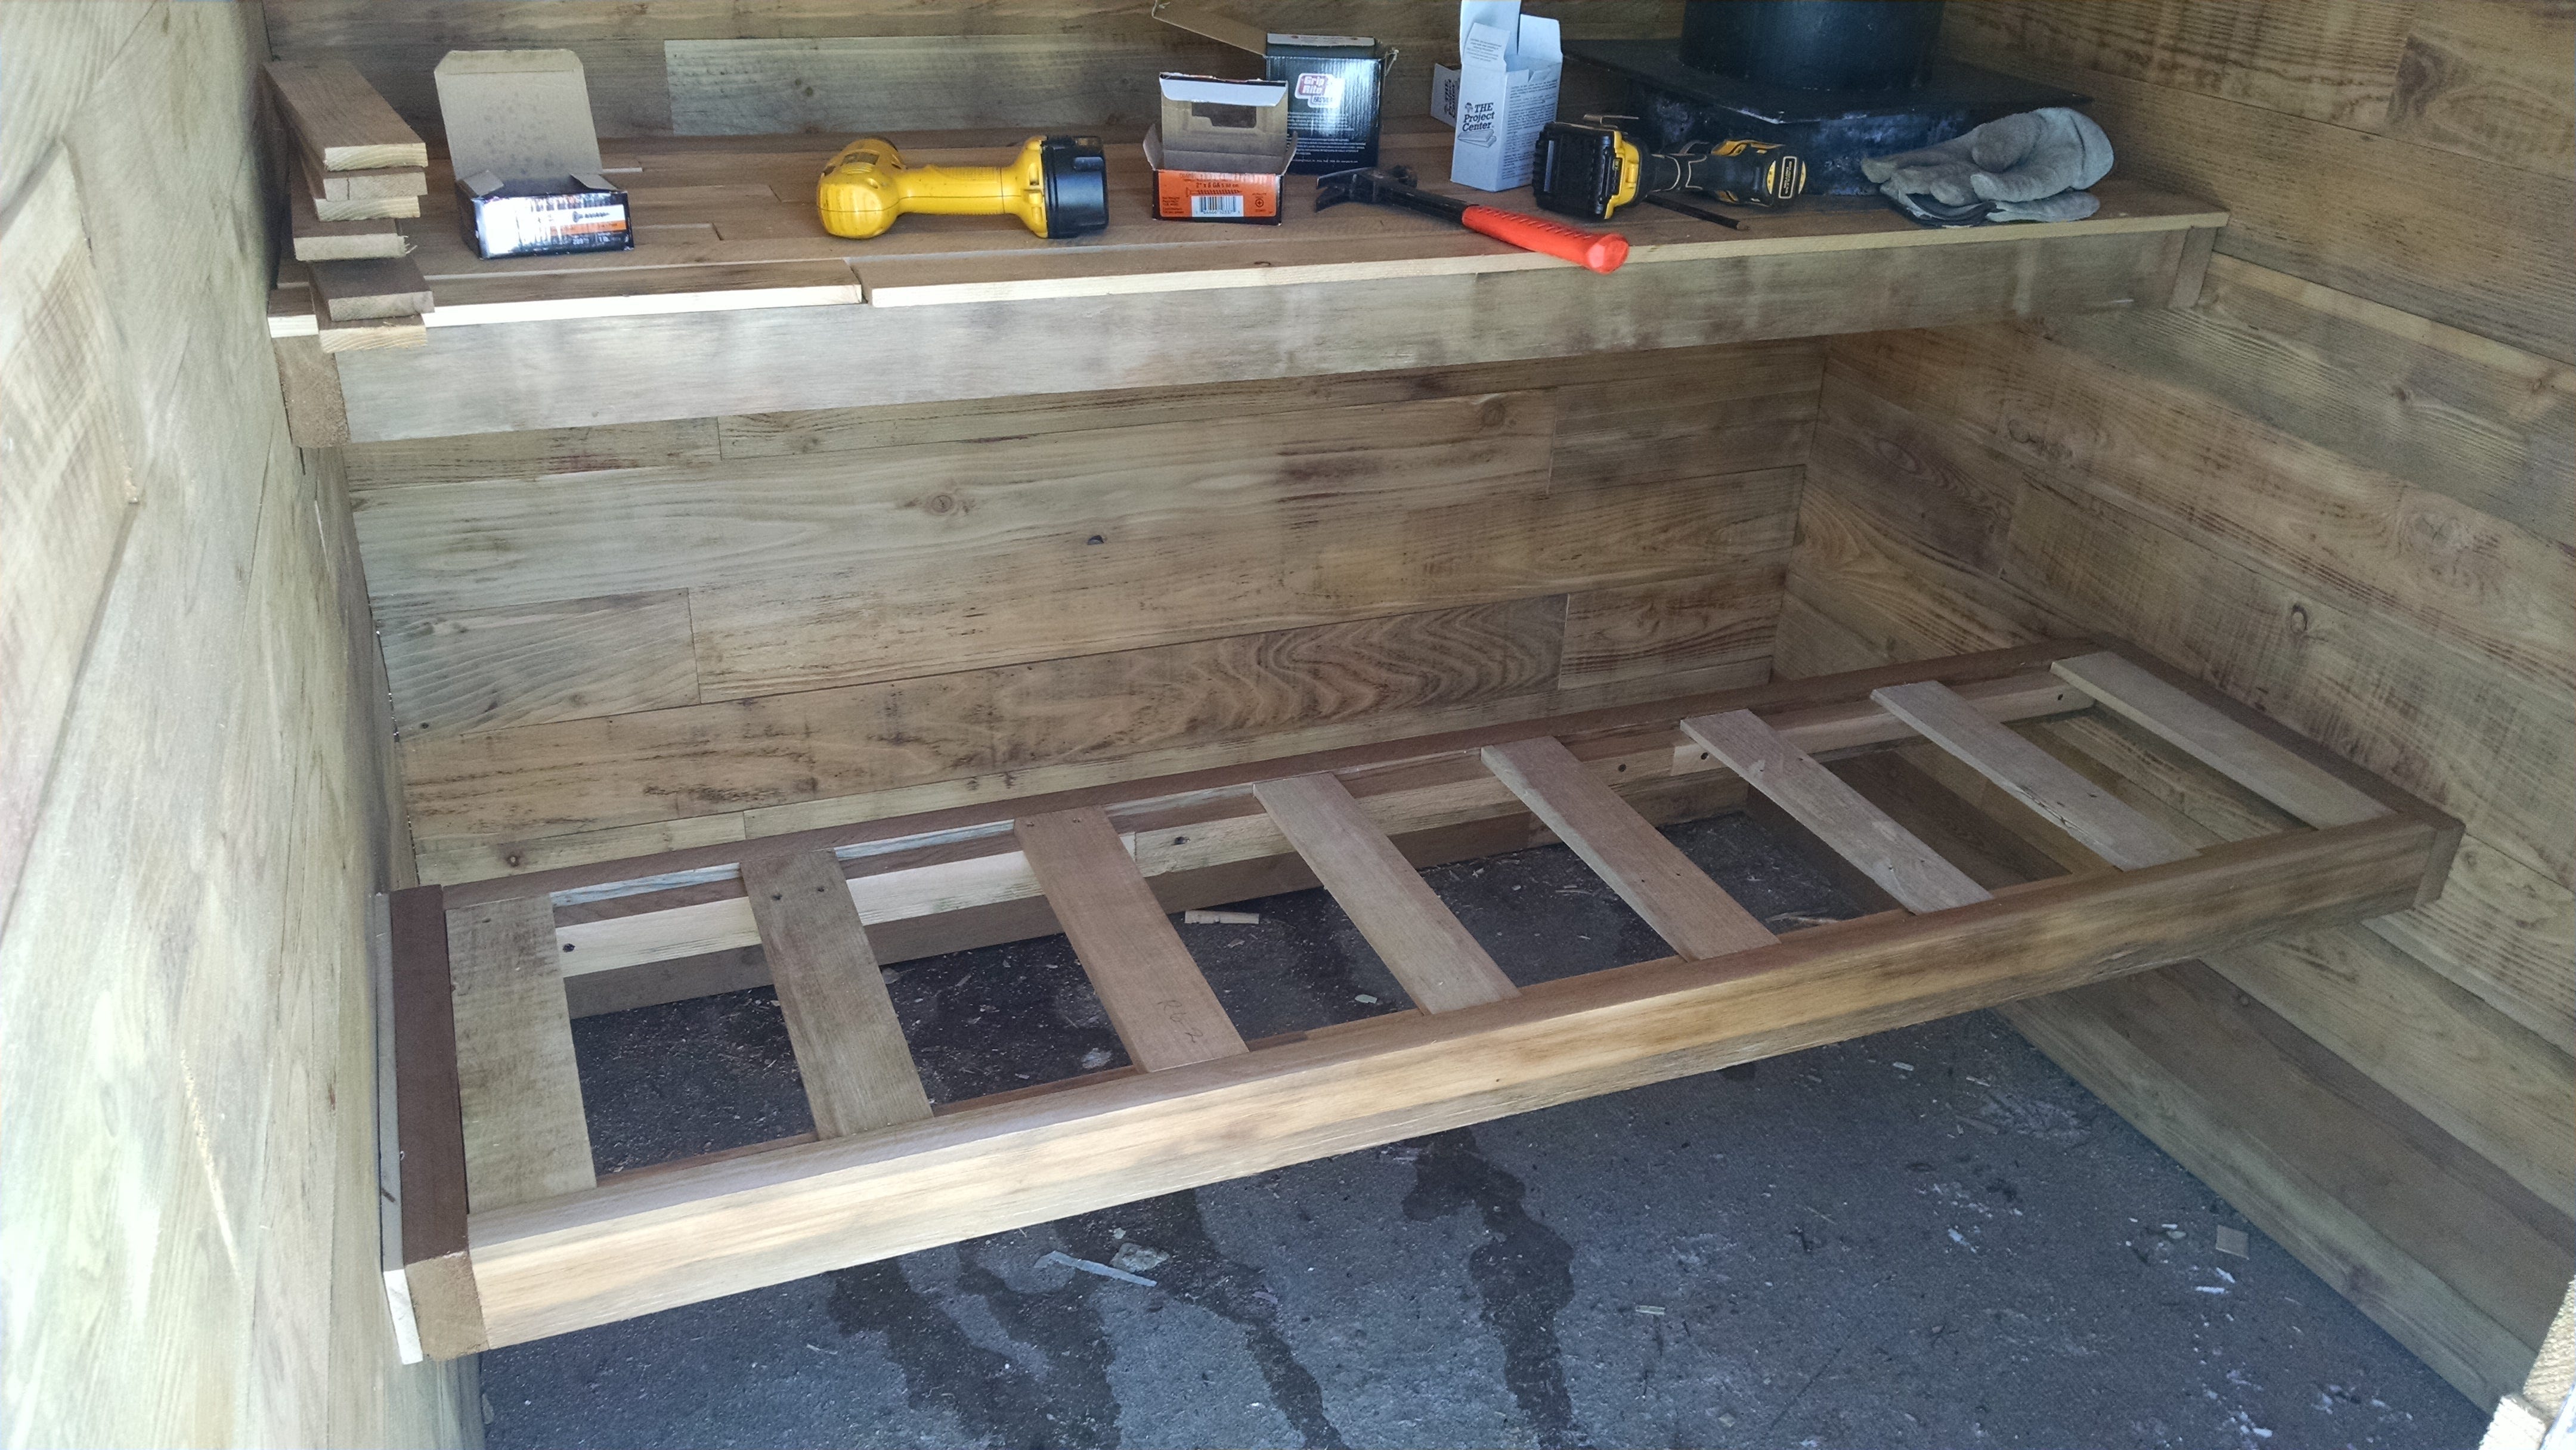
The Sauna Build
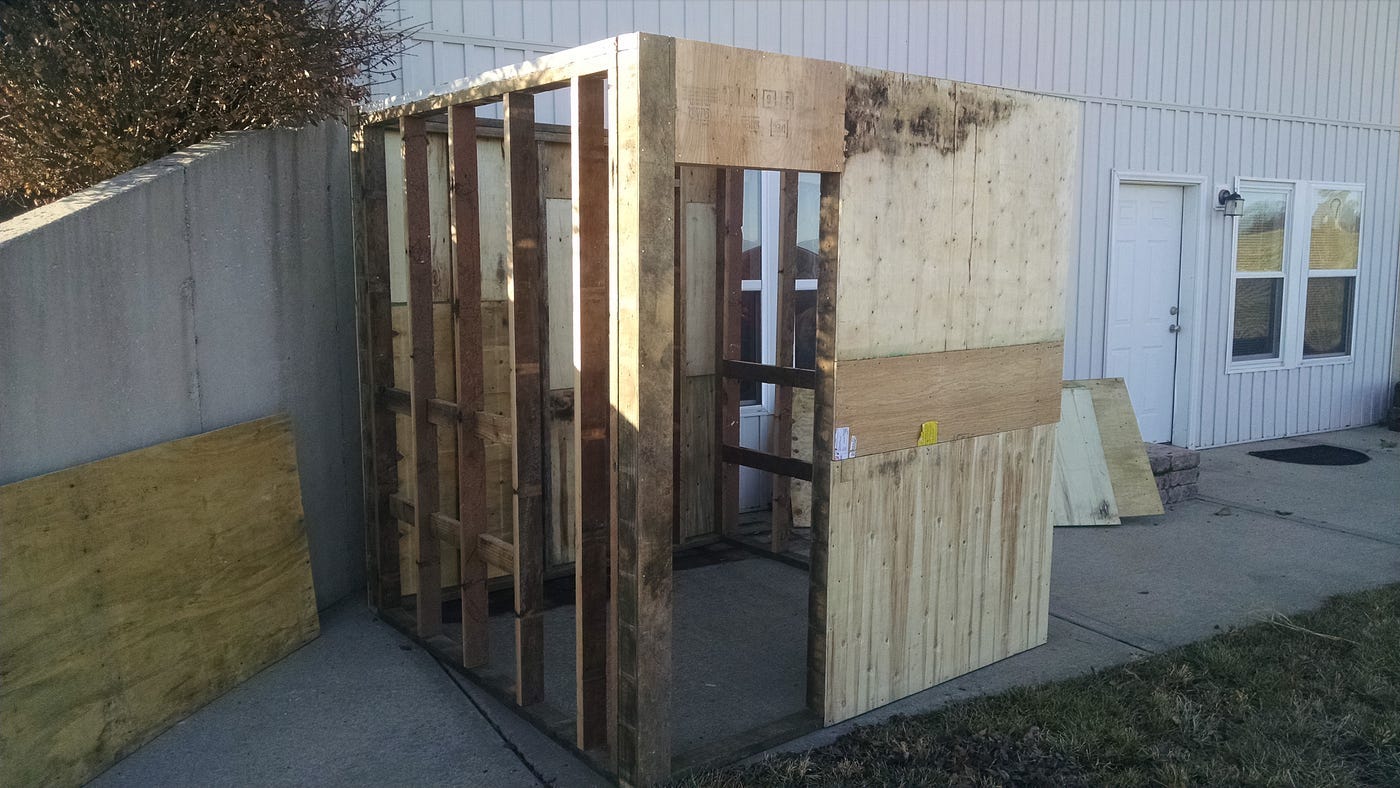
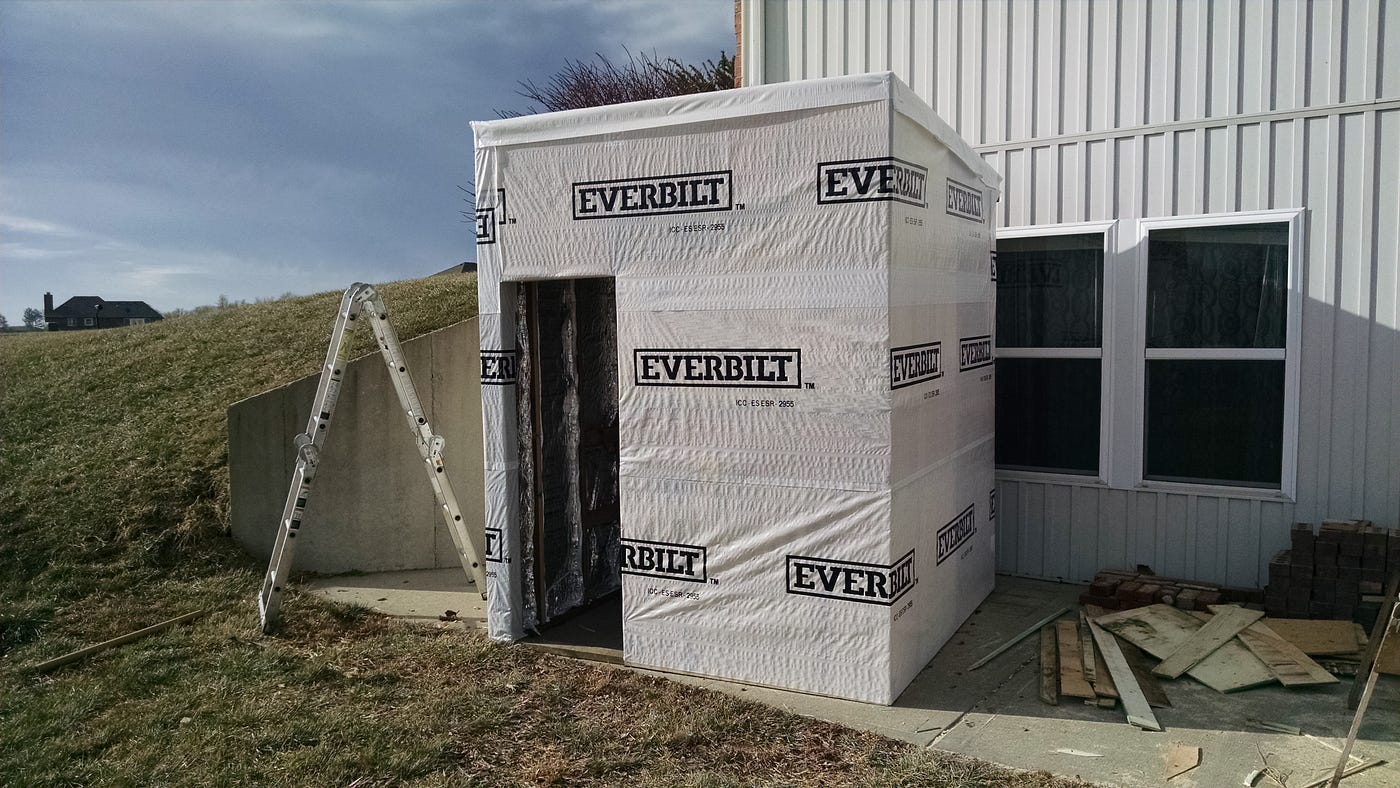
Retired from military service, I could wait no longer. I decided to design and build one of my own. Originally, I was planning to build a large sauna with shower area and stone patio in my back yard. But I realized it was not yet in the budget for time and money. So I decided to build a “temporary” version as inexpensively as I could.
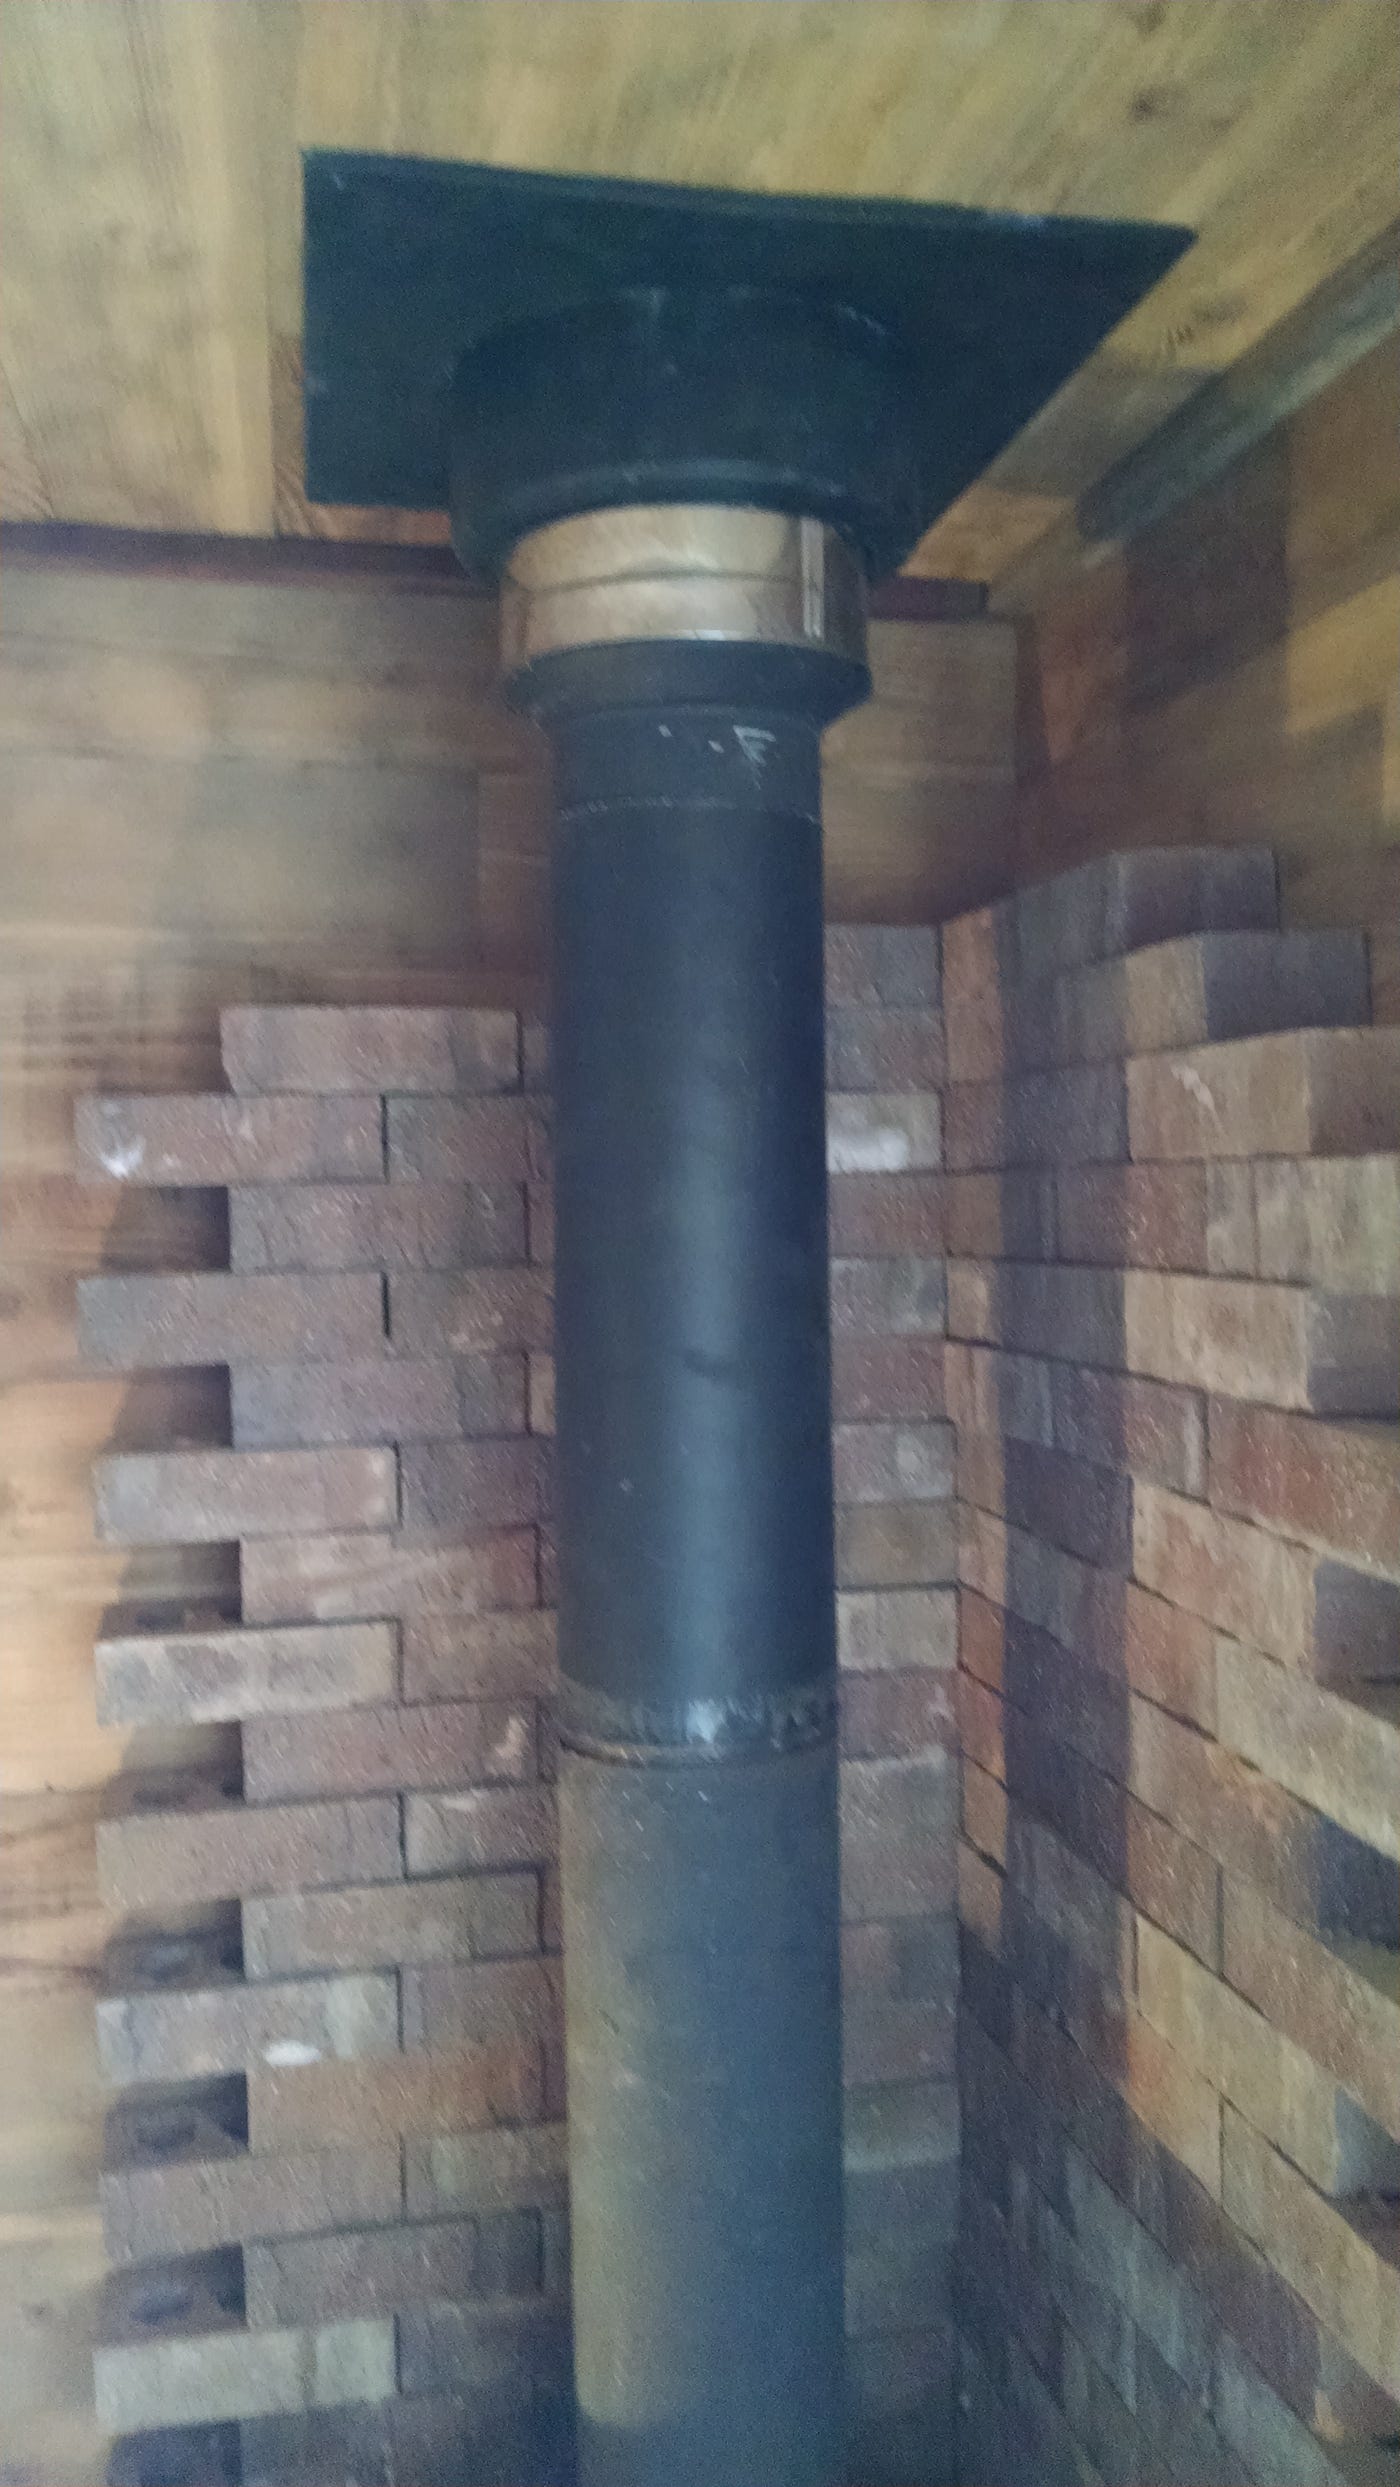
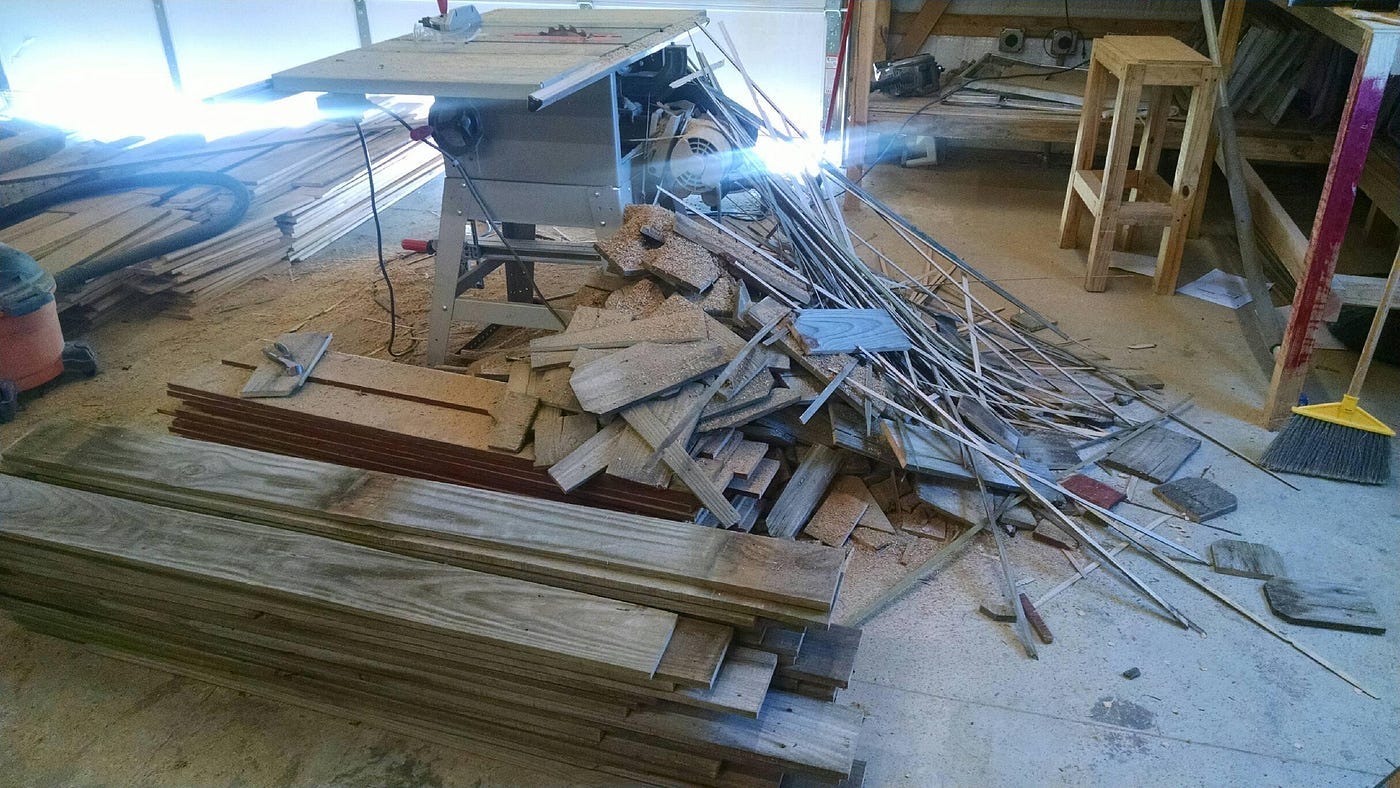
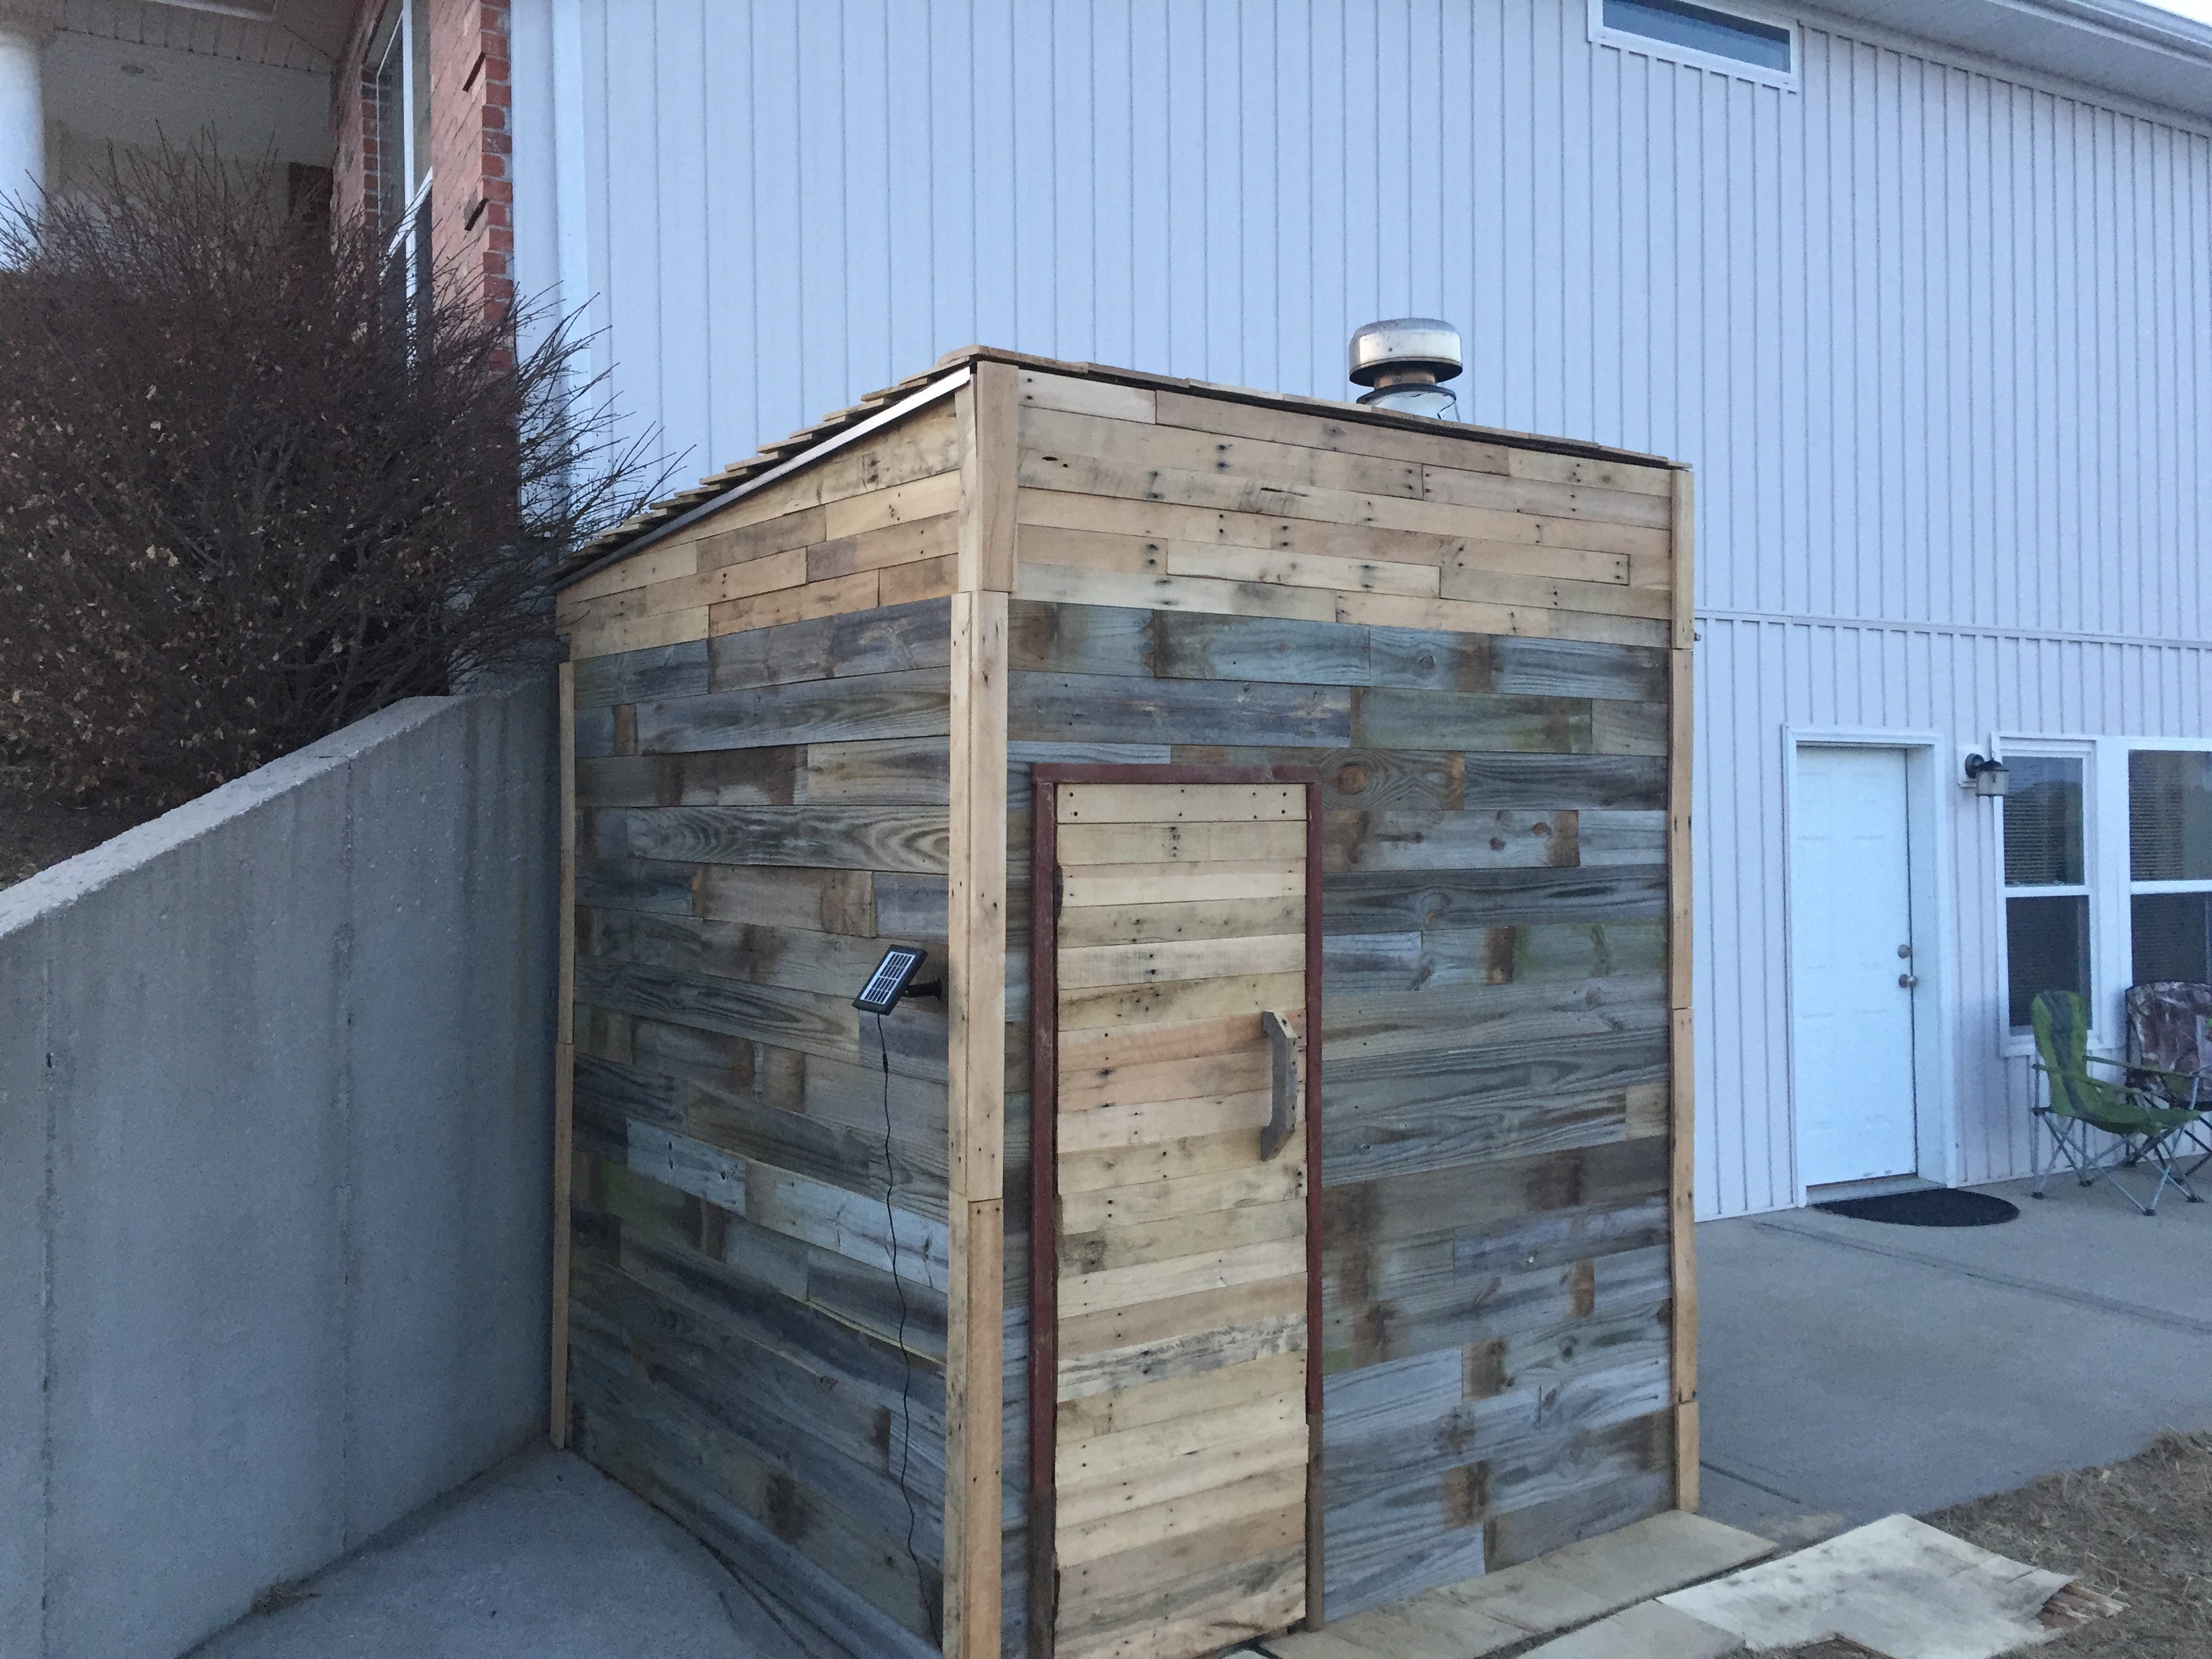
I set up a few Craigslist alerts on my phone to let me know when scrap wood, stove, chimney and other materials would pop up. I was able to source all of the wood for about $40, which included enough cedar for the interior and benches. Everything but the fasteners (nails, staples, rivets, and stove cement), vapor foil, thermometer, and the solar light is reclaimed. The insulation was leftovers from building my workshop, the stove came from a trade of reclaimed plywood, the chimney from Craigslist, some bricks from a house being torn down, the roof tar paper from a builder, the shingles from wood scrap, the flashing from aluminum scrap. I have about $380 into the project, with the biggest single expense, by far, being the chimney components.
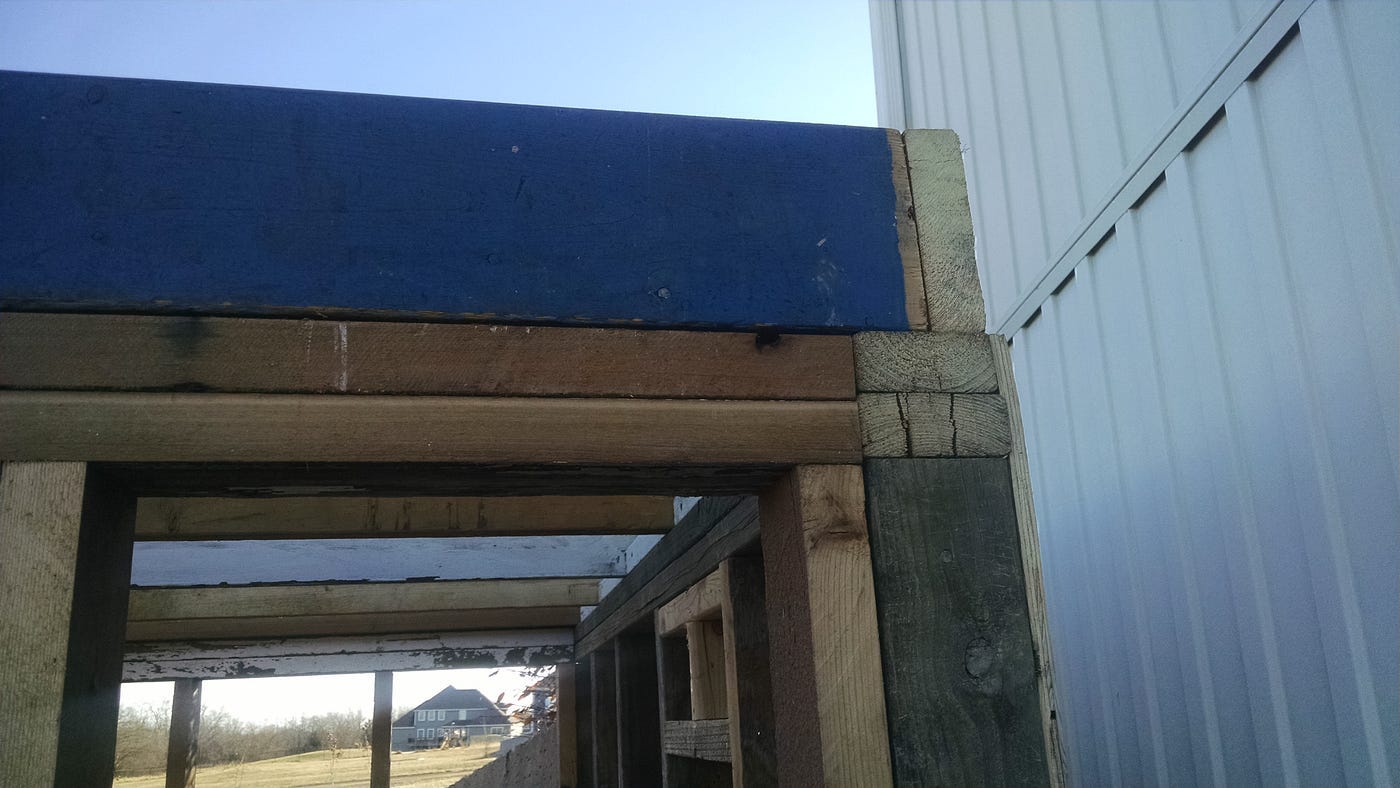
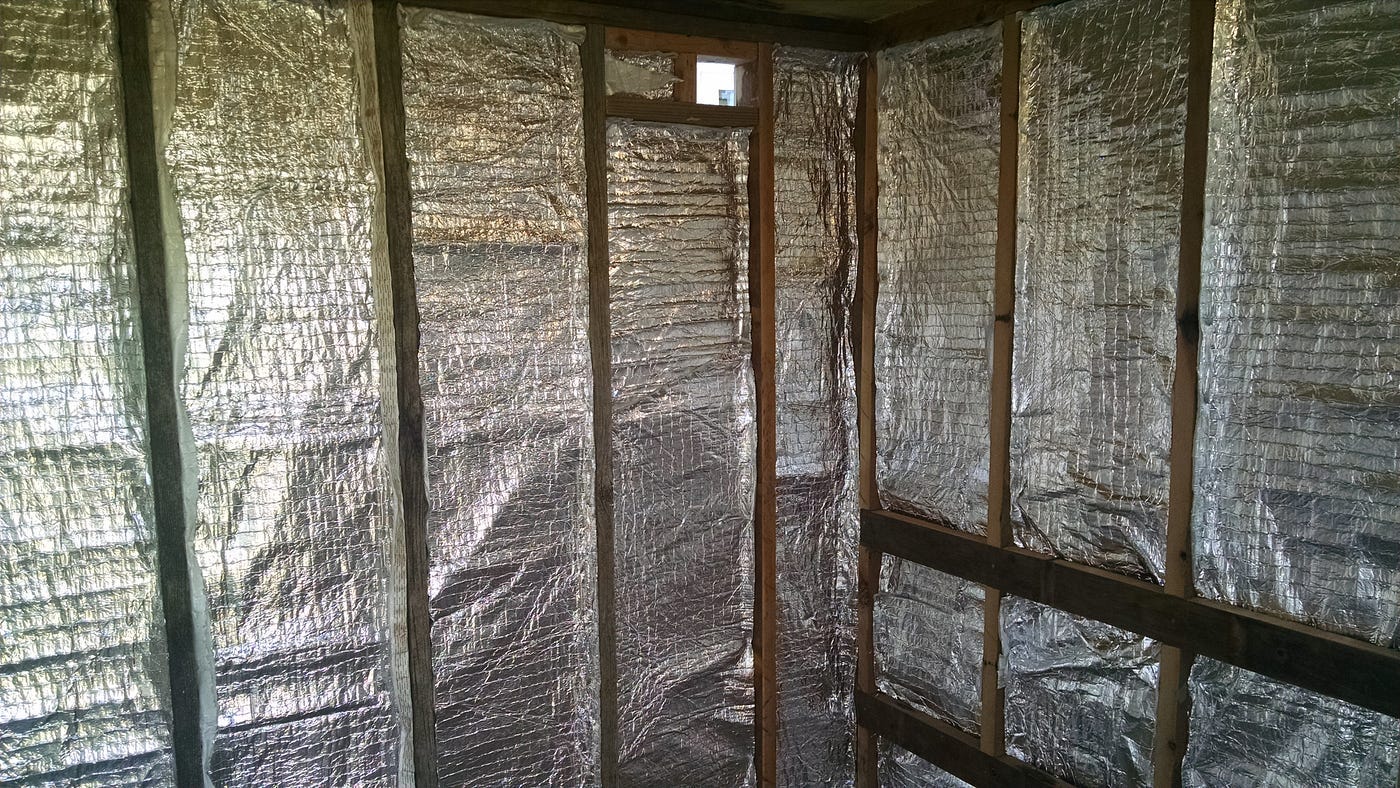
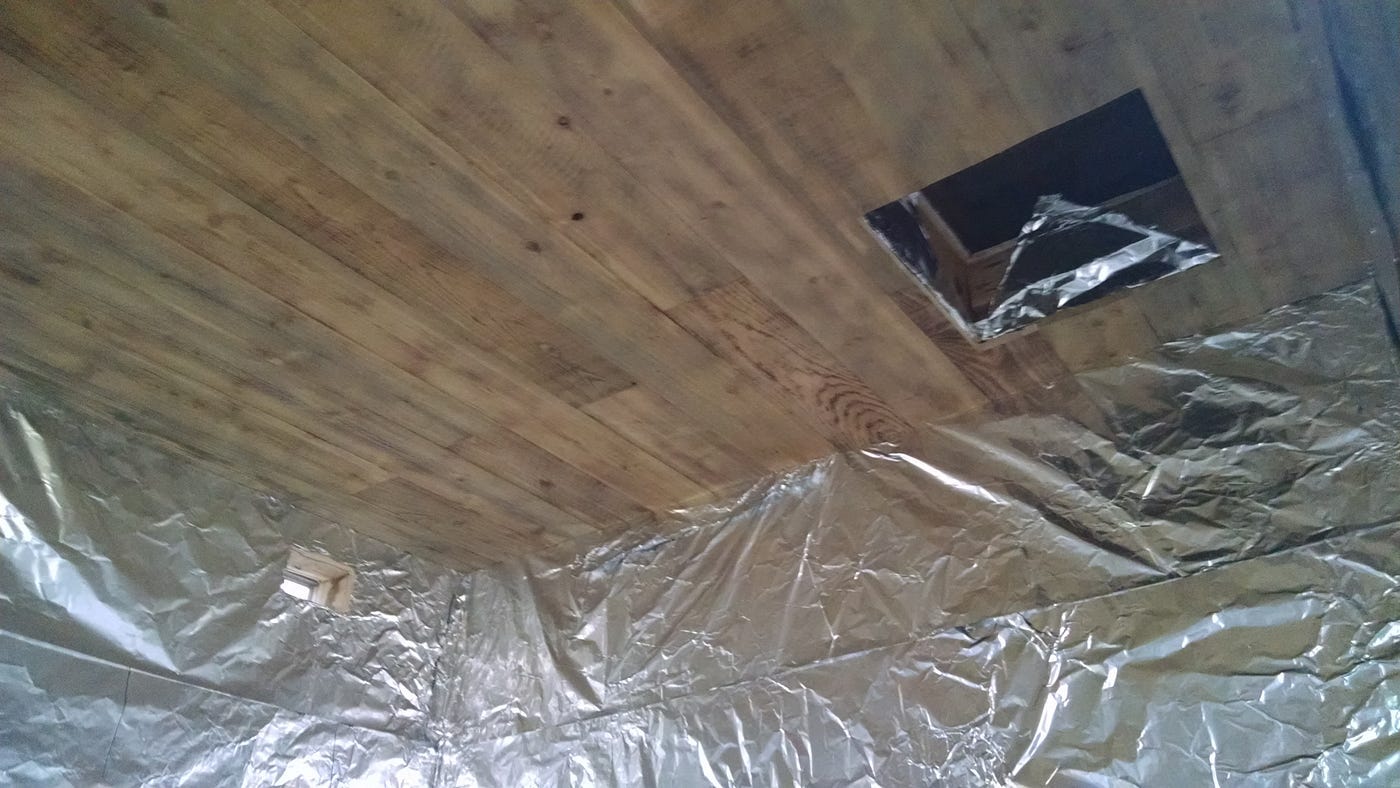
I designed the plans from a variety of sources which included my own ideas, books, and internet layouts. I framed the walls to be 6'6" an all four sides, and 7' tall. The ceiling is framed 2x6"s. The walls are insulated with a layer of polysiocyanurate insulation and a layer of the foam foil insulation. Tinfoil serves as a vapor barrier between the cedar panel boards and the studs. There is plywood just inside the inner and outer paneling which reduces airflow. In the roof, there is a layer of foam foil and six inch thick pink fiberglass insulation (I figure equivalent of R-20 on the sides and R-30 in the ceiling). It heats up fast and stays warm.
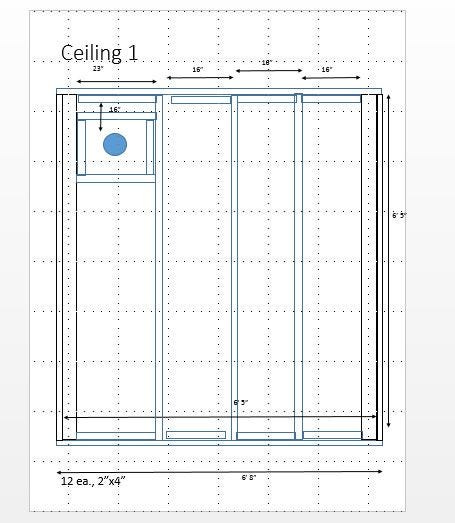
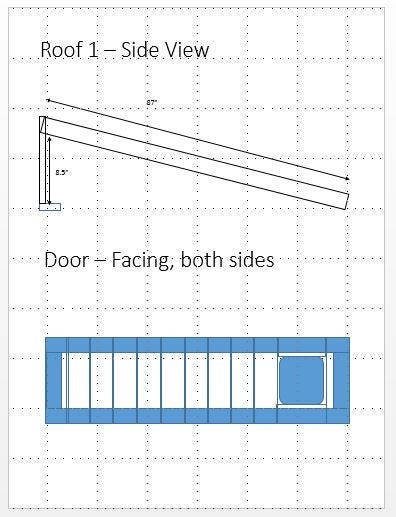
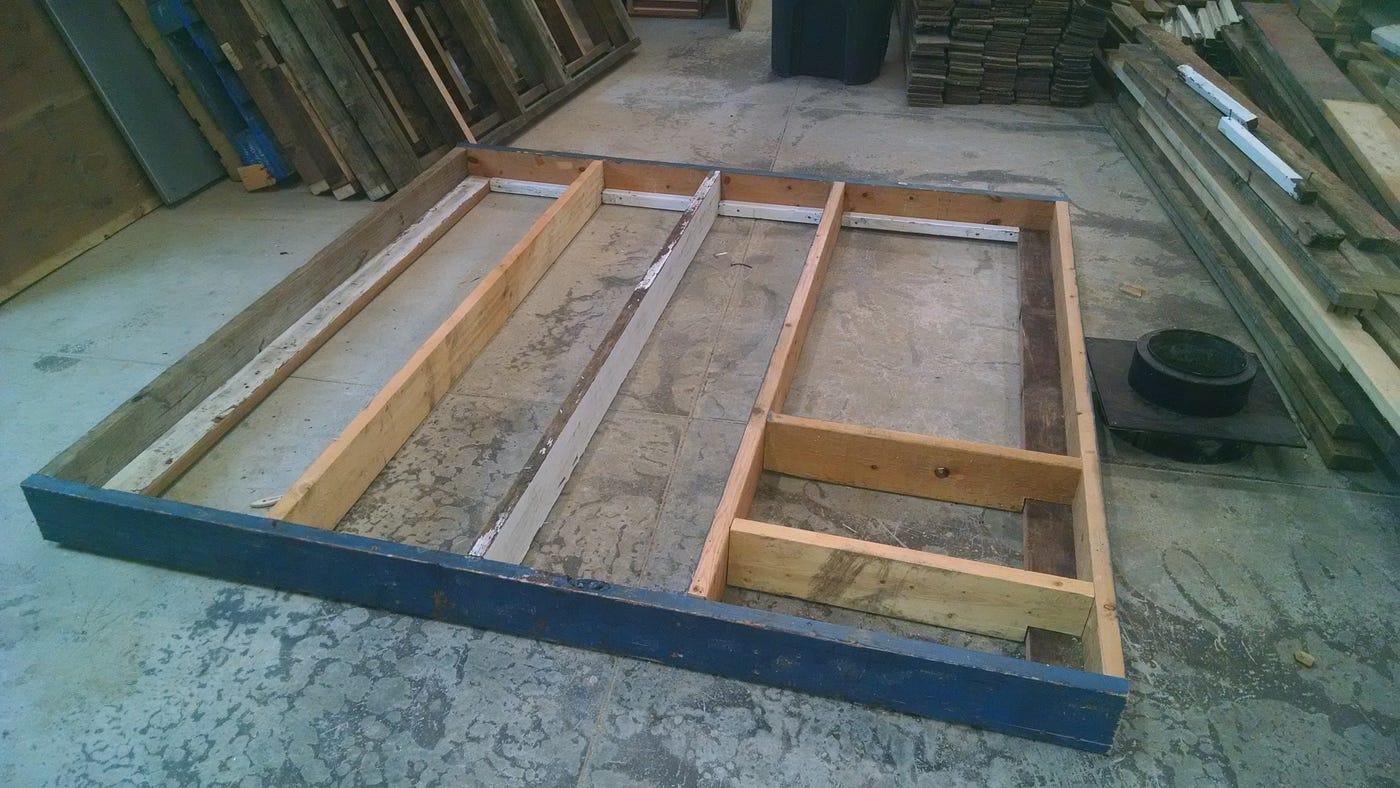
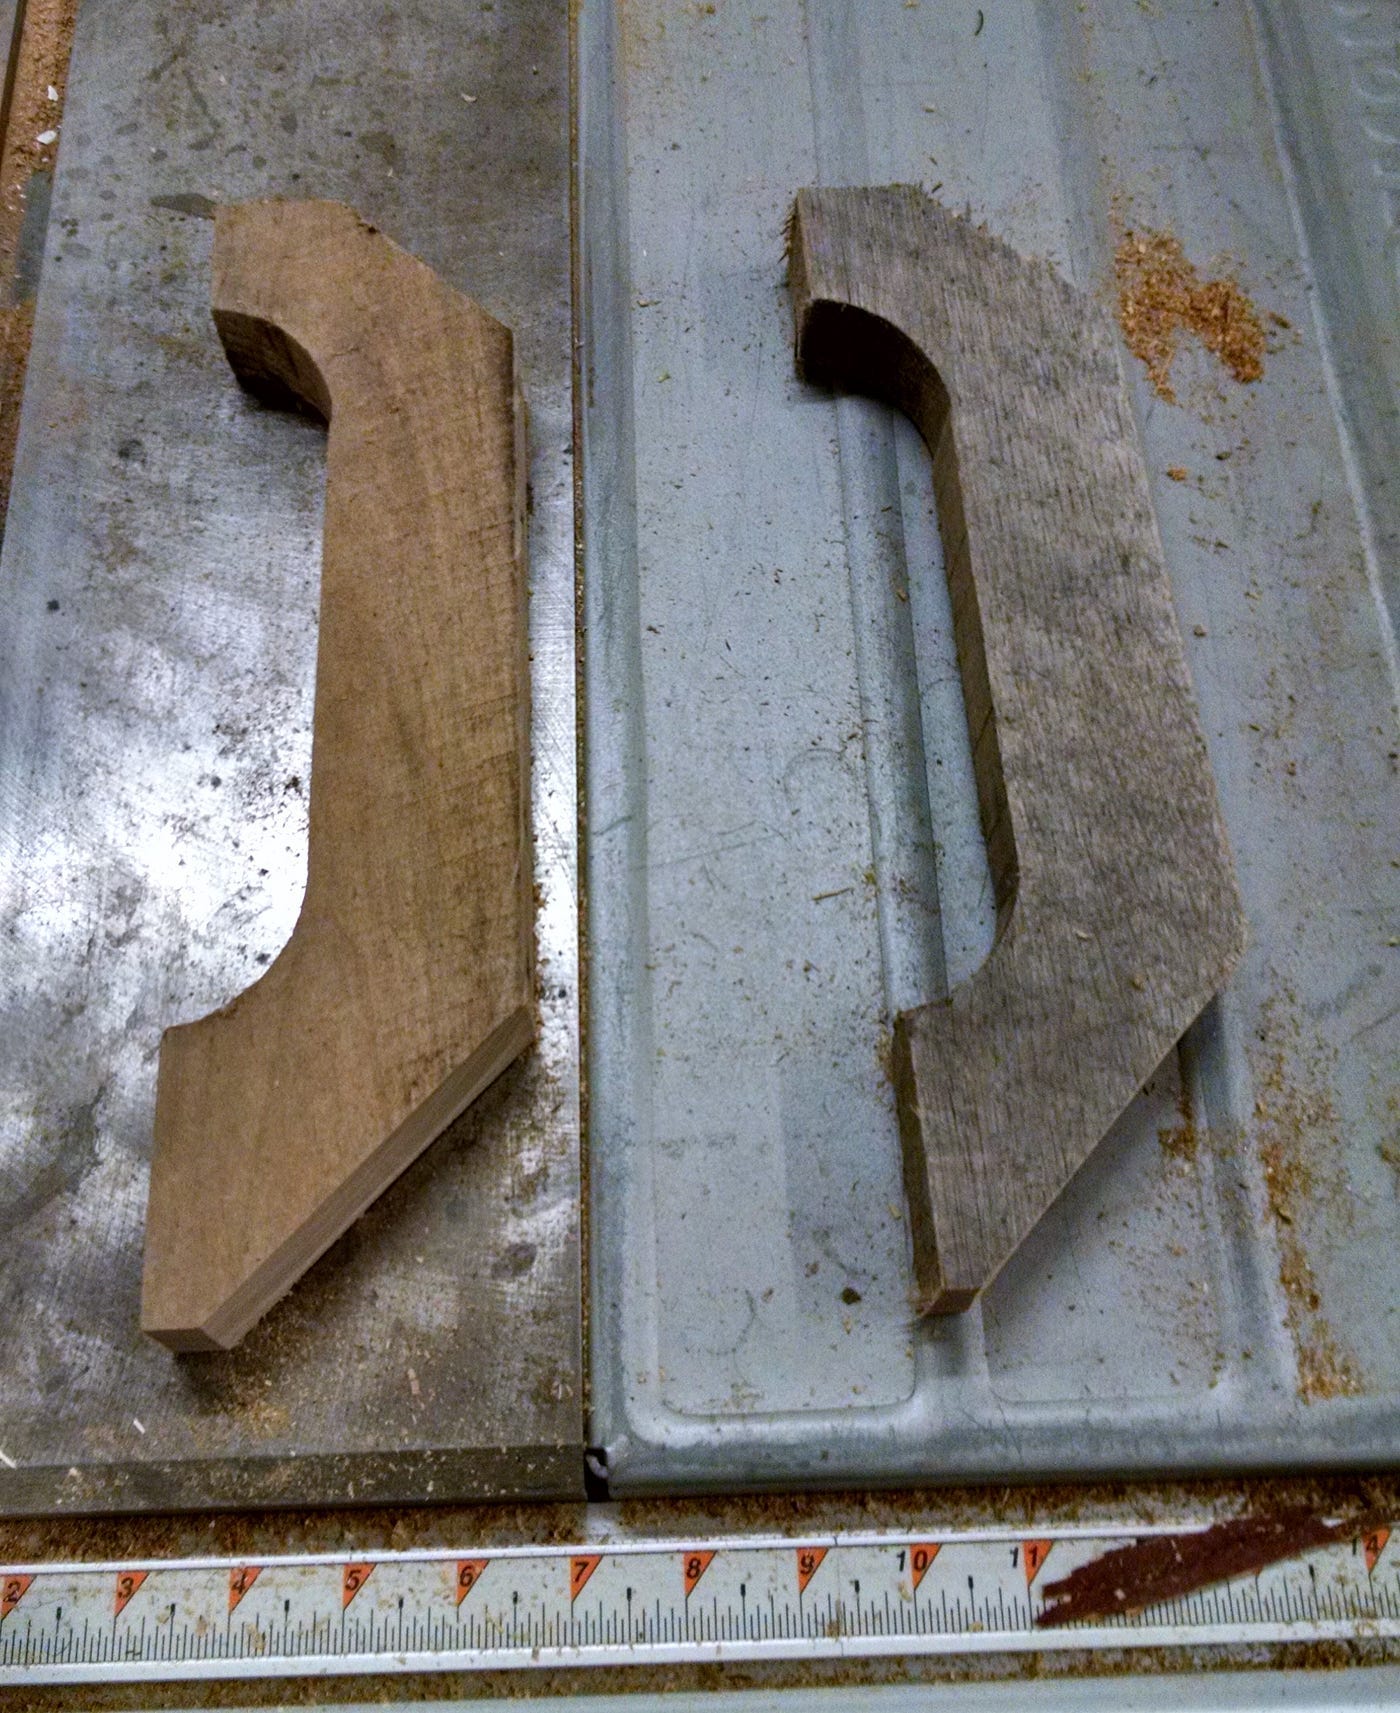
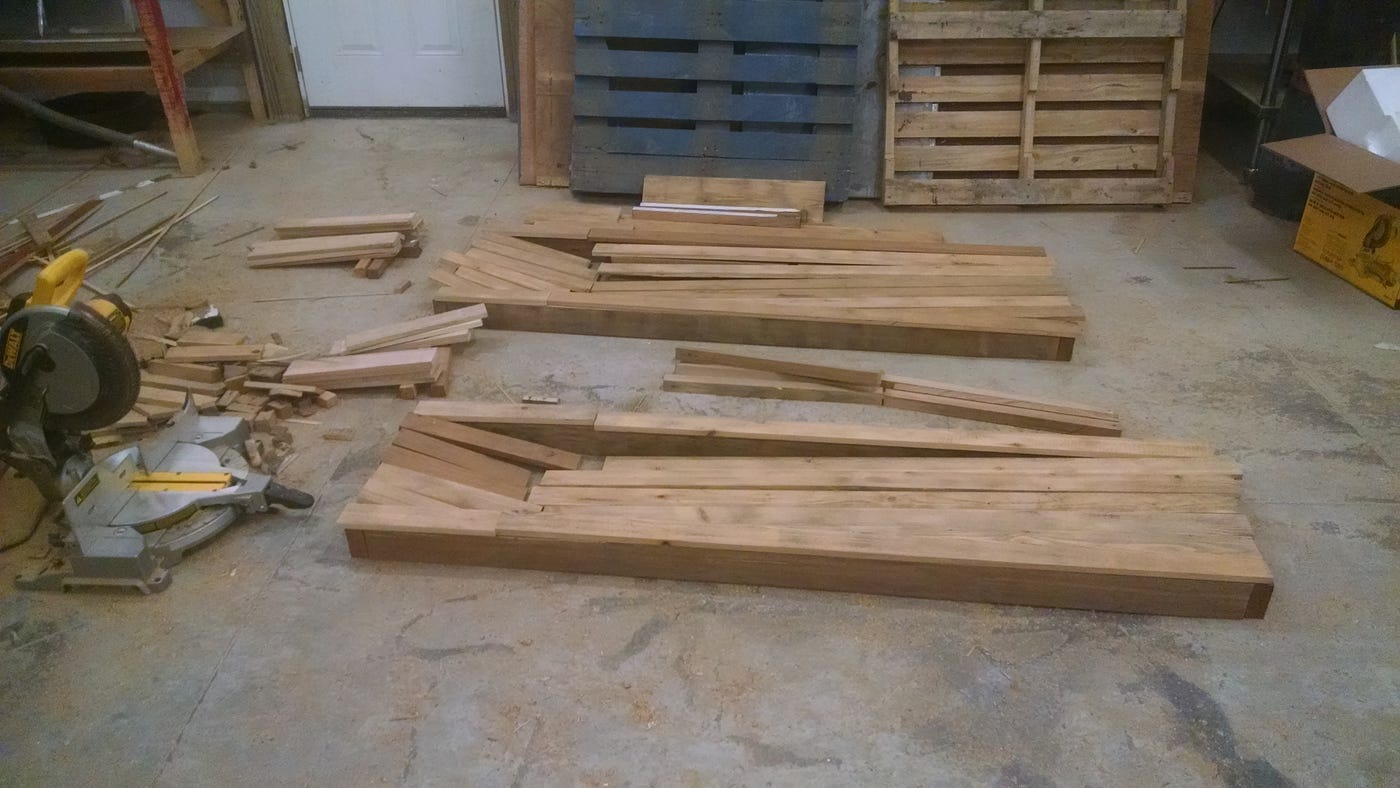
Taking a lesson from the pre-fab sauna, I framed the walls, ceiling, and roof in my workshop using traditional stick frame techniques with 16" on-center stud spacing. I designed the roof with nearly a 10:1 pitch, which in hindsight is probably a little less than I would do again — but it has worked out fine. I had started to cut all the interior wall panels out of pallet slats when I found the cedar boards and used them. I sanded a huge stack of cedar, then ripped them to size and straightness. All of the interior and exterior cedar wall planks were pre-cut in the workshop to rough length before I moved everything to the assembly site. And yes, there was a bit of blood, as I have clumsy fingers and hands.
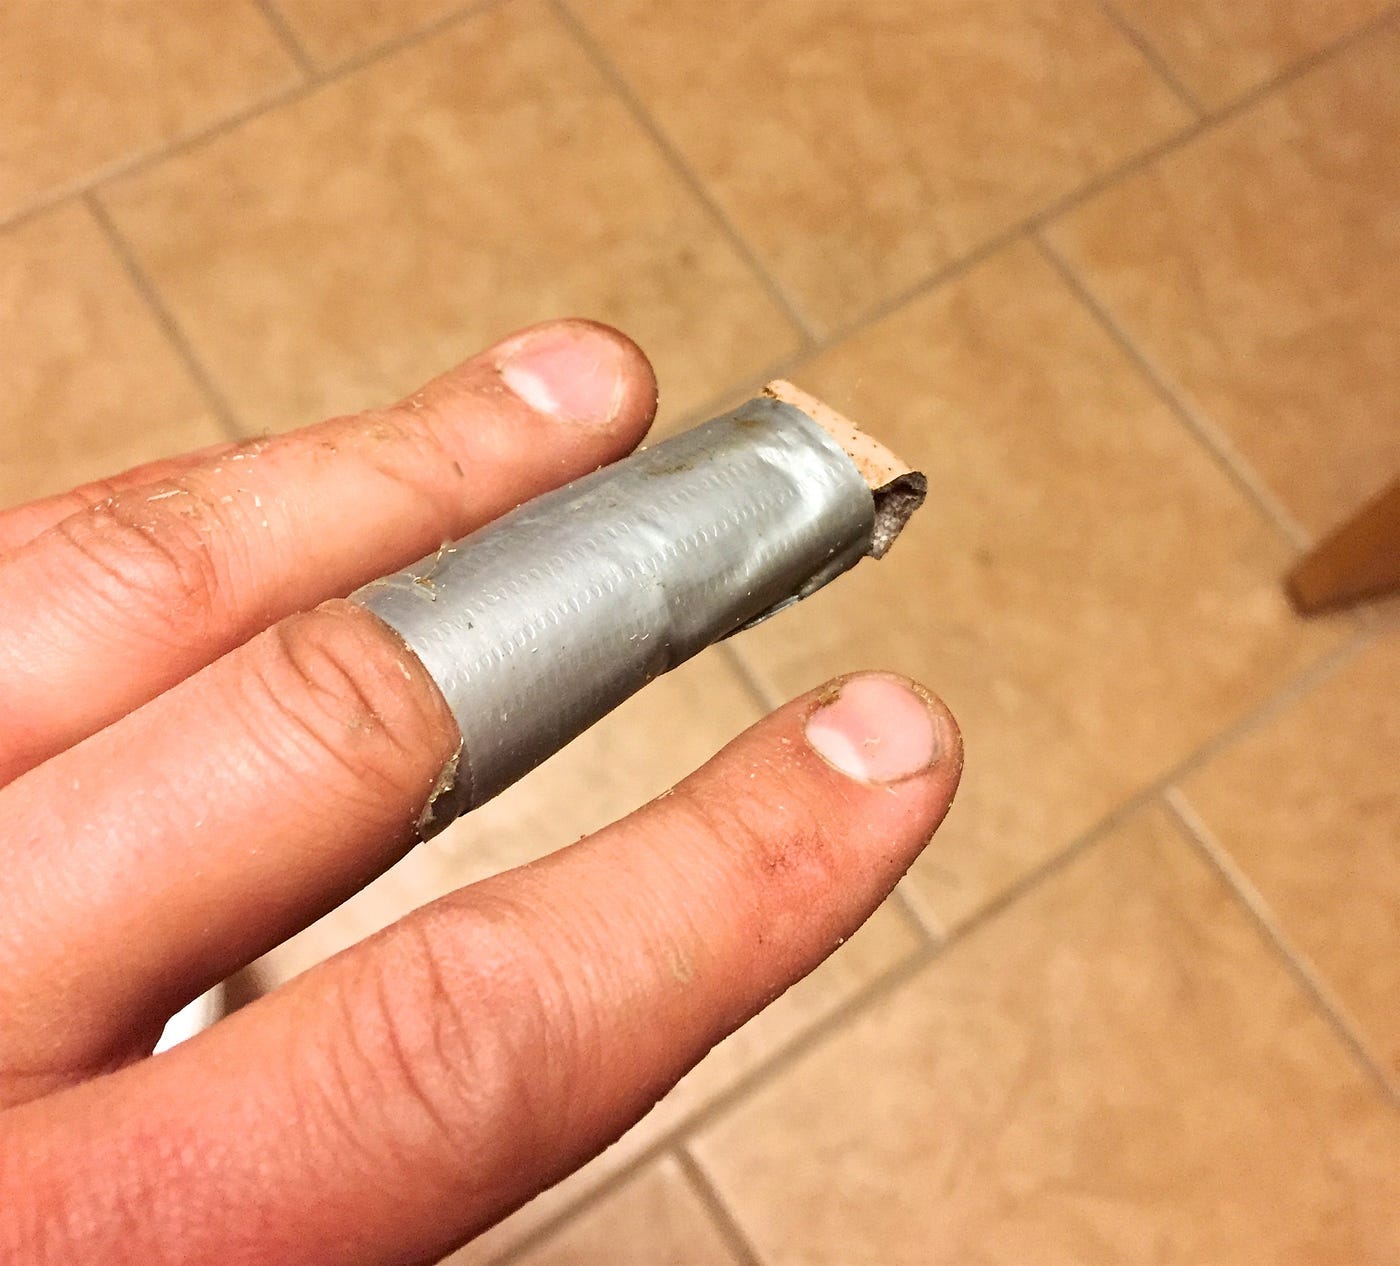
Duct tape is the handy-man’s secret weapon.
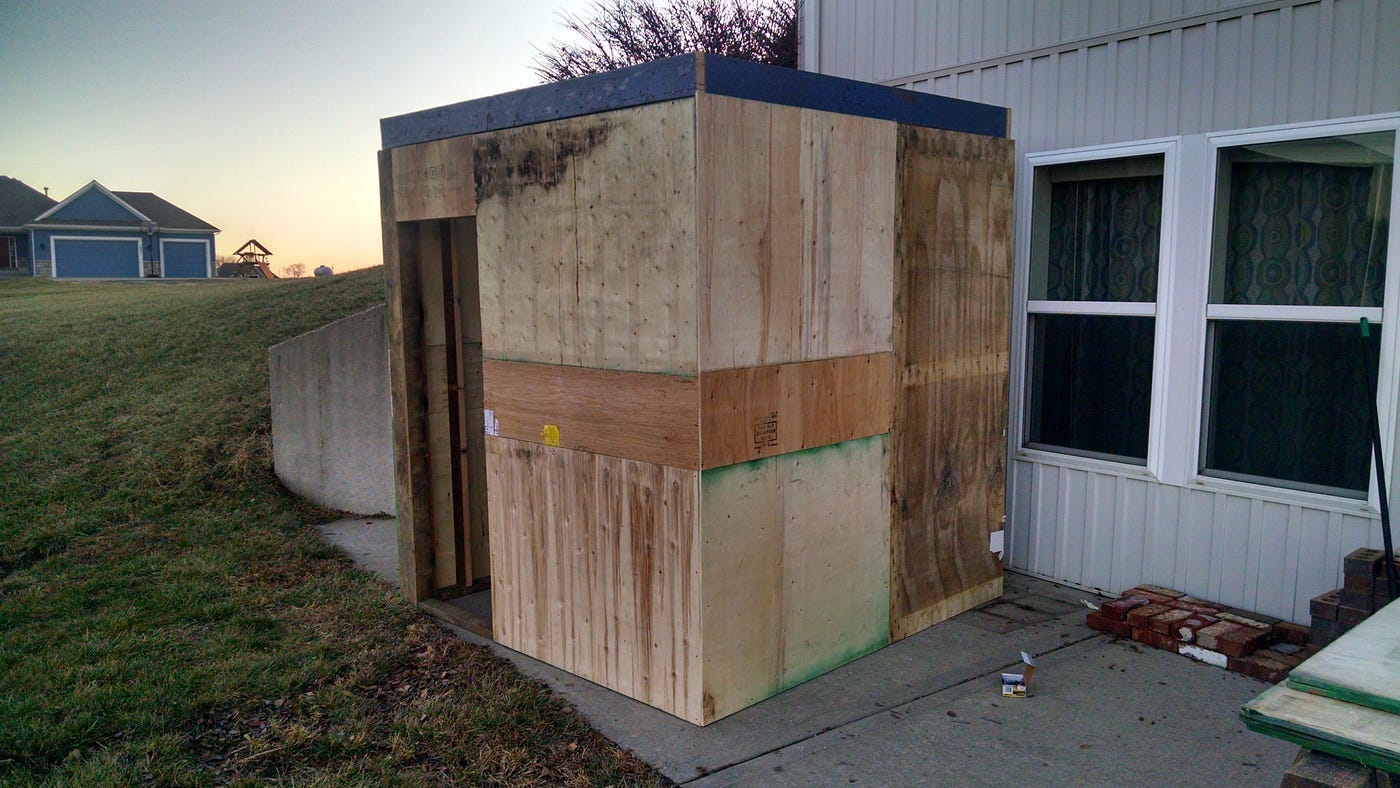
The walls are quite thick. From interior to exterior the layers are: cedar plank, tinfoil vapor barrier, 3/8" plywood, foam foil insulation, poly-foam insulation, 3/8" plywood, house wrap, pine planks. The door is pretty heavy with only one less layer. Fortunately, the ReStore has a huge bin of door hinges and latches. (I could make roughly 476 saunas with what was in the bin.)
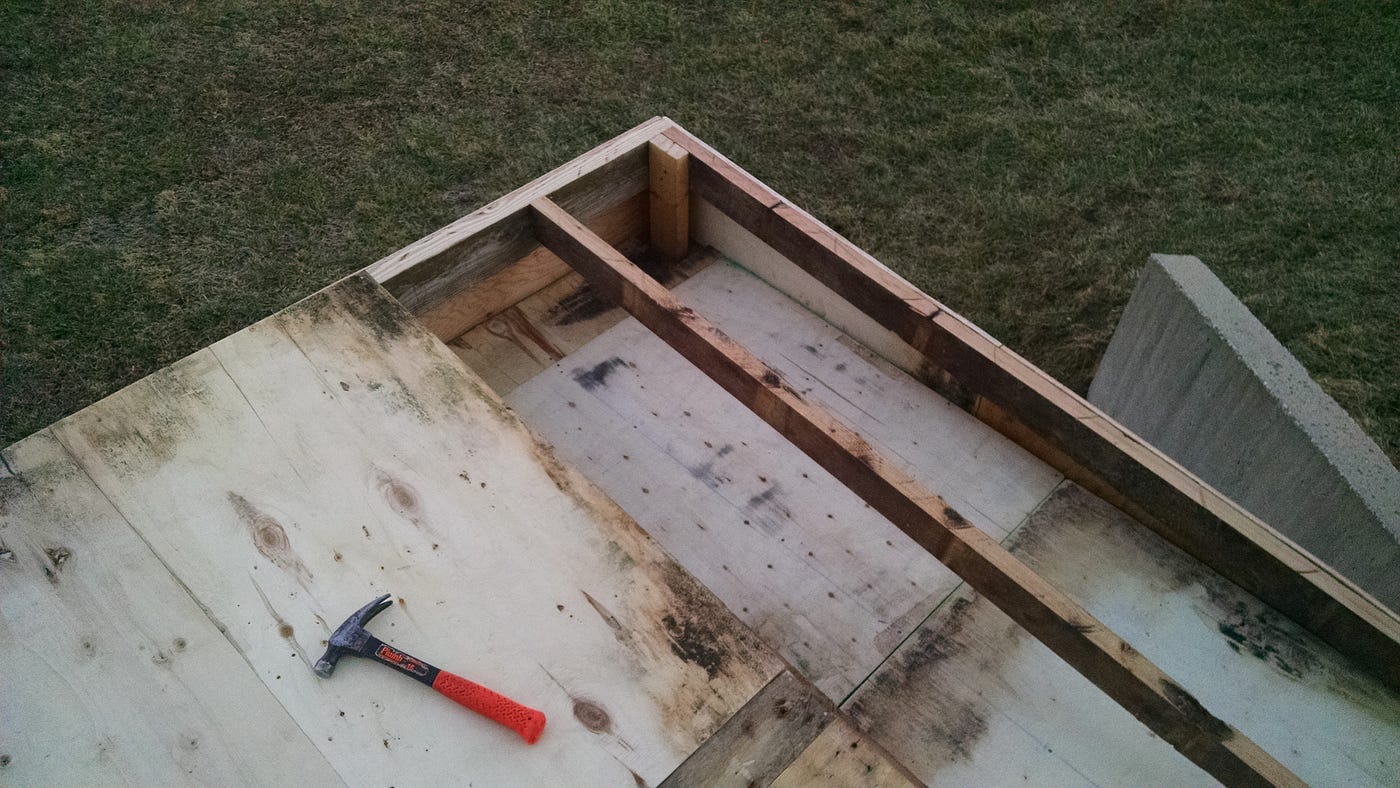
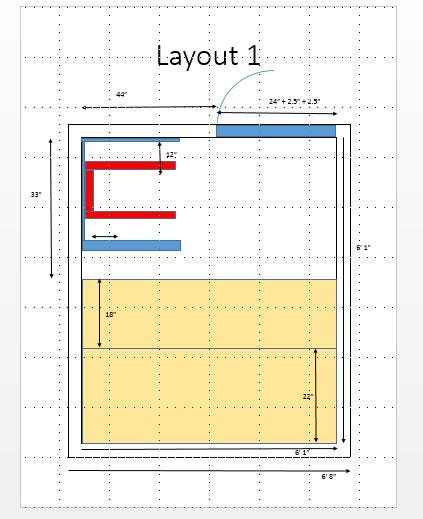
The layout is a simple, two parallel benches on one side, with the upper bench at 22" wide and the lower at 18". I made duckboard flooring out of old pallet slats I sanded; it is superb. I don’t dump a lot of water, but what gets dumped seems to run out fine. The door swings outward, with its placement all the way to the front left edge to maximize space. I thought about putting in a window, but the only reclaimed glass I had was too large. It wasn’t a big issue for me, and my wife prefers not to have one — so we don’t. I will probably have a window when I build a larger sauna, but for now, it’s fine.

Lastly, I put a vent near the ceiling on the back wall, as far from the bottom of the door as possible. I installed a small piece of screen into the wall under the siding to keep the bugs out. There is a sliding piece of wood on the inside to control airflow. I considered a vent near the bottom of the stove, but instead went with a 3/8" gap under the door, which seems to be perfect. There is plenty of airflow under the door without affecting the temperature of the room or the fire.
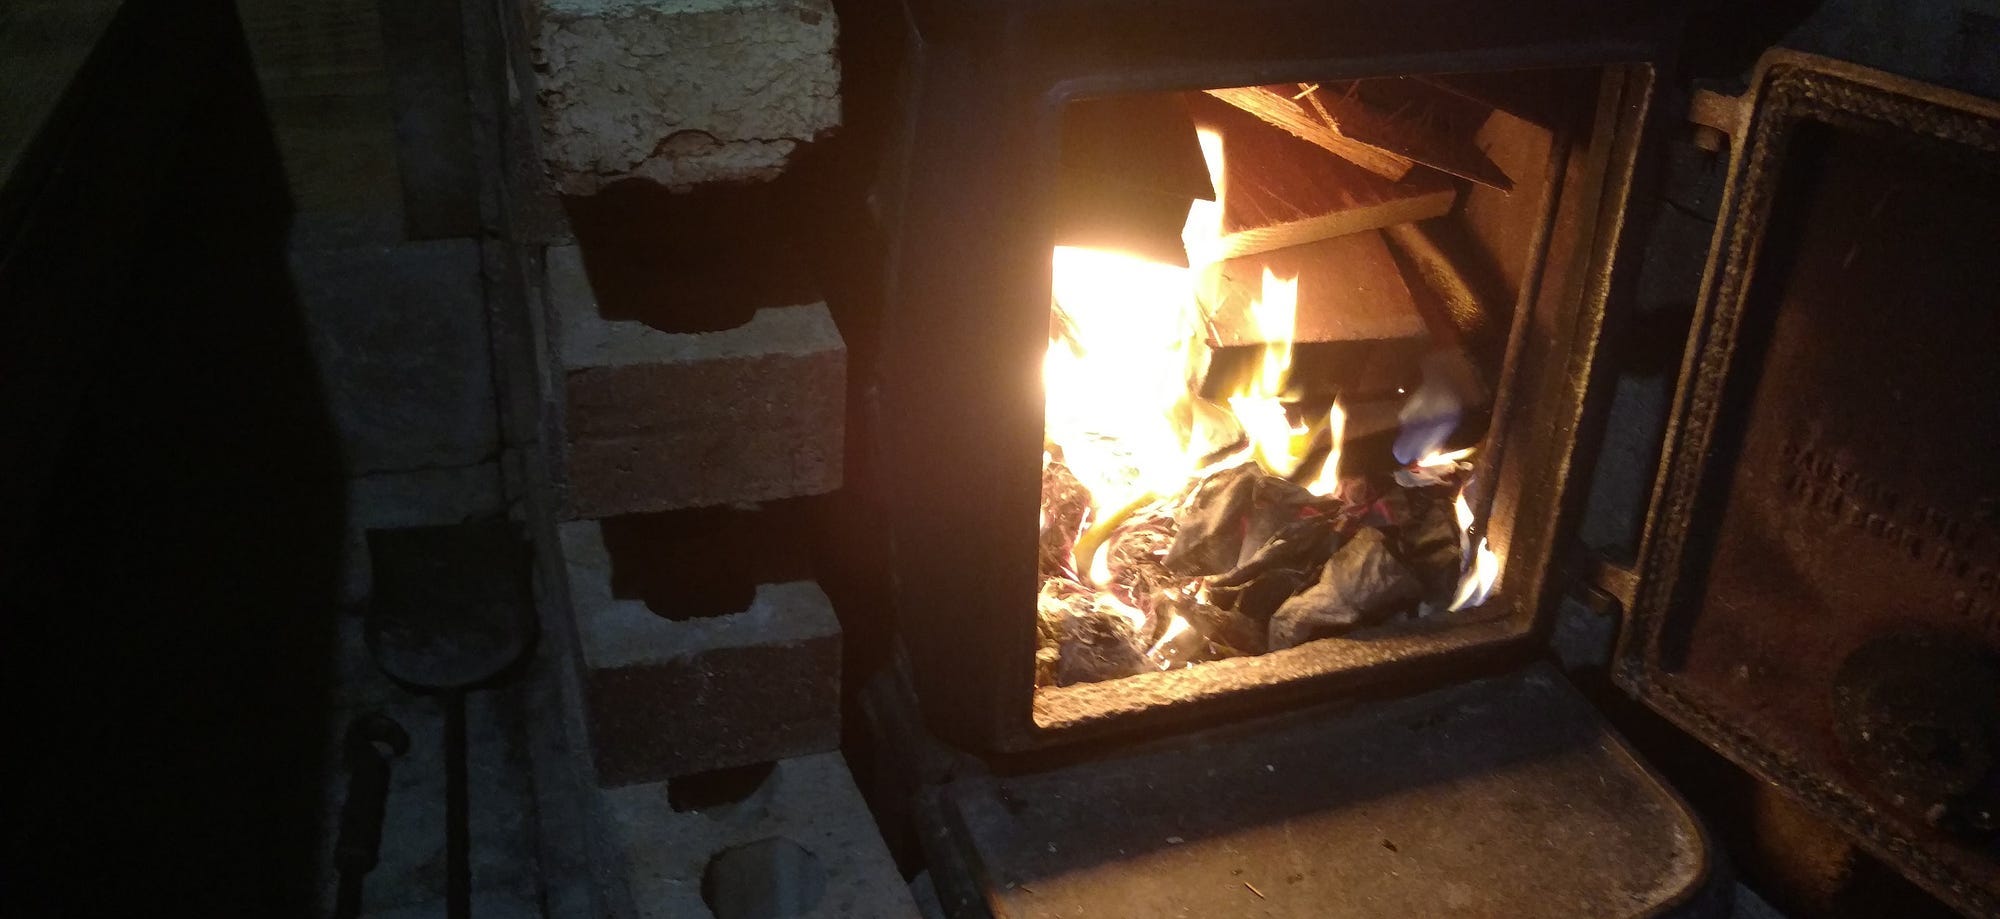
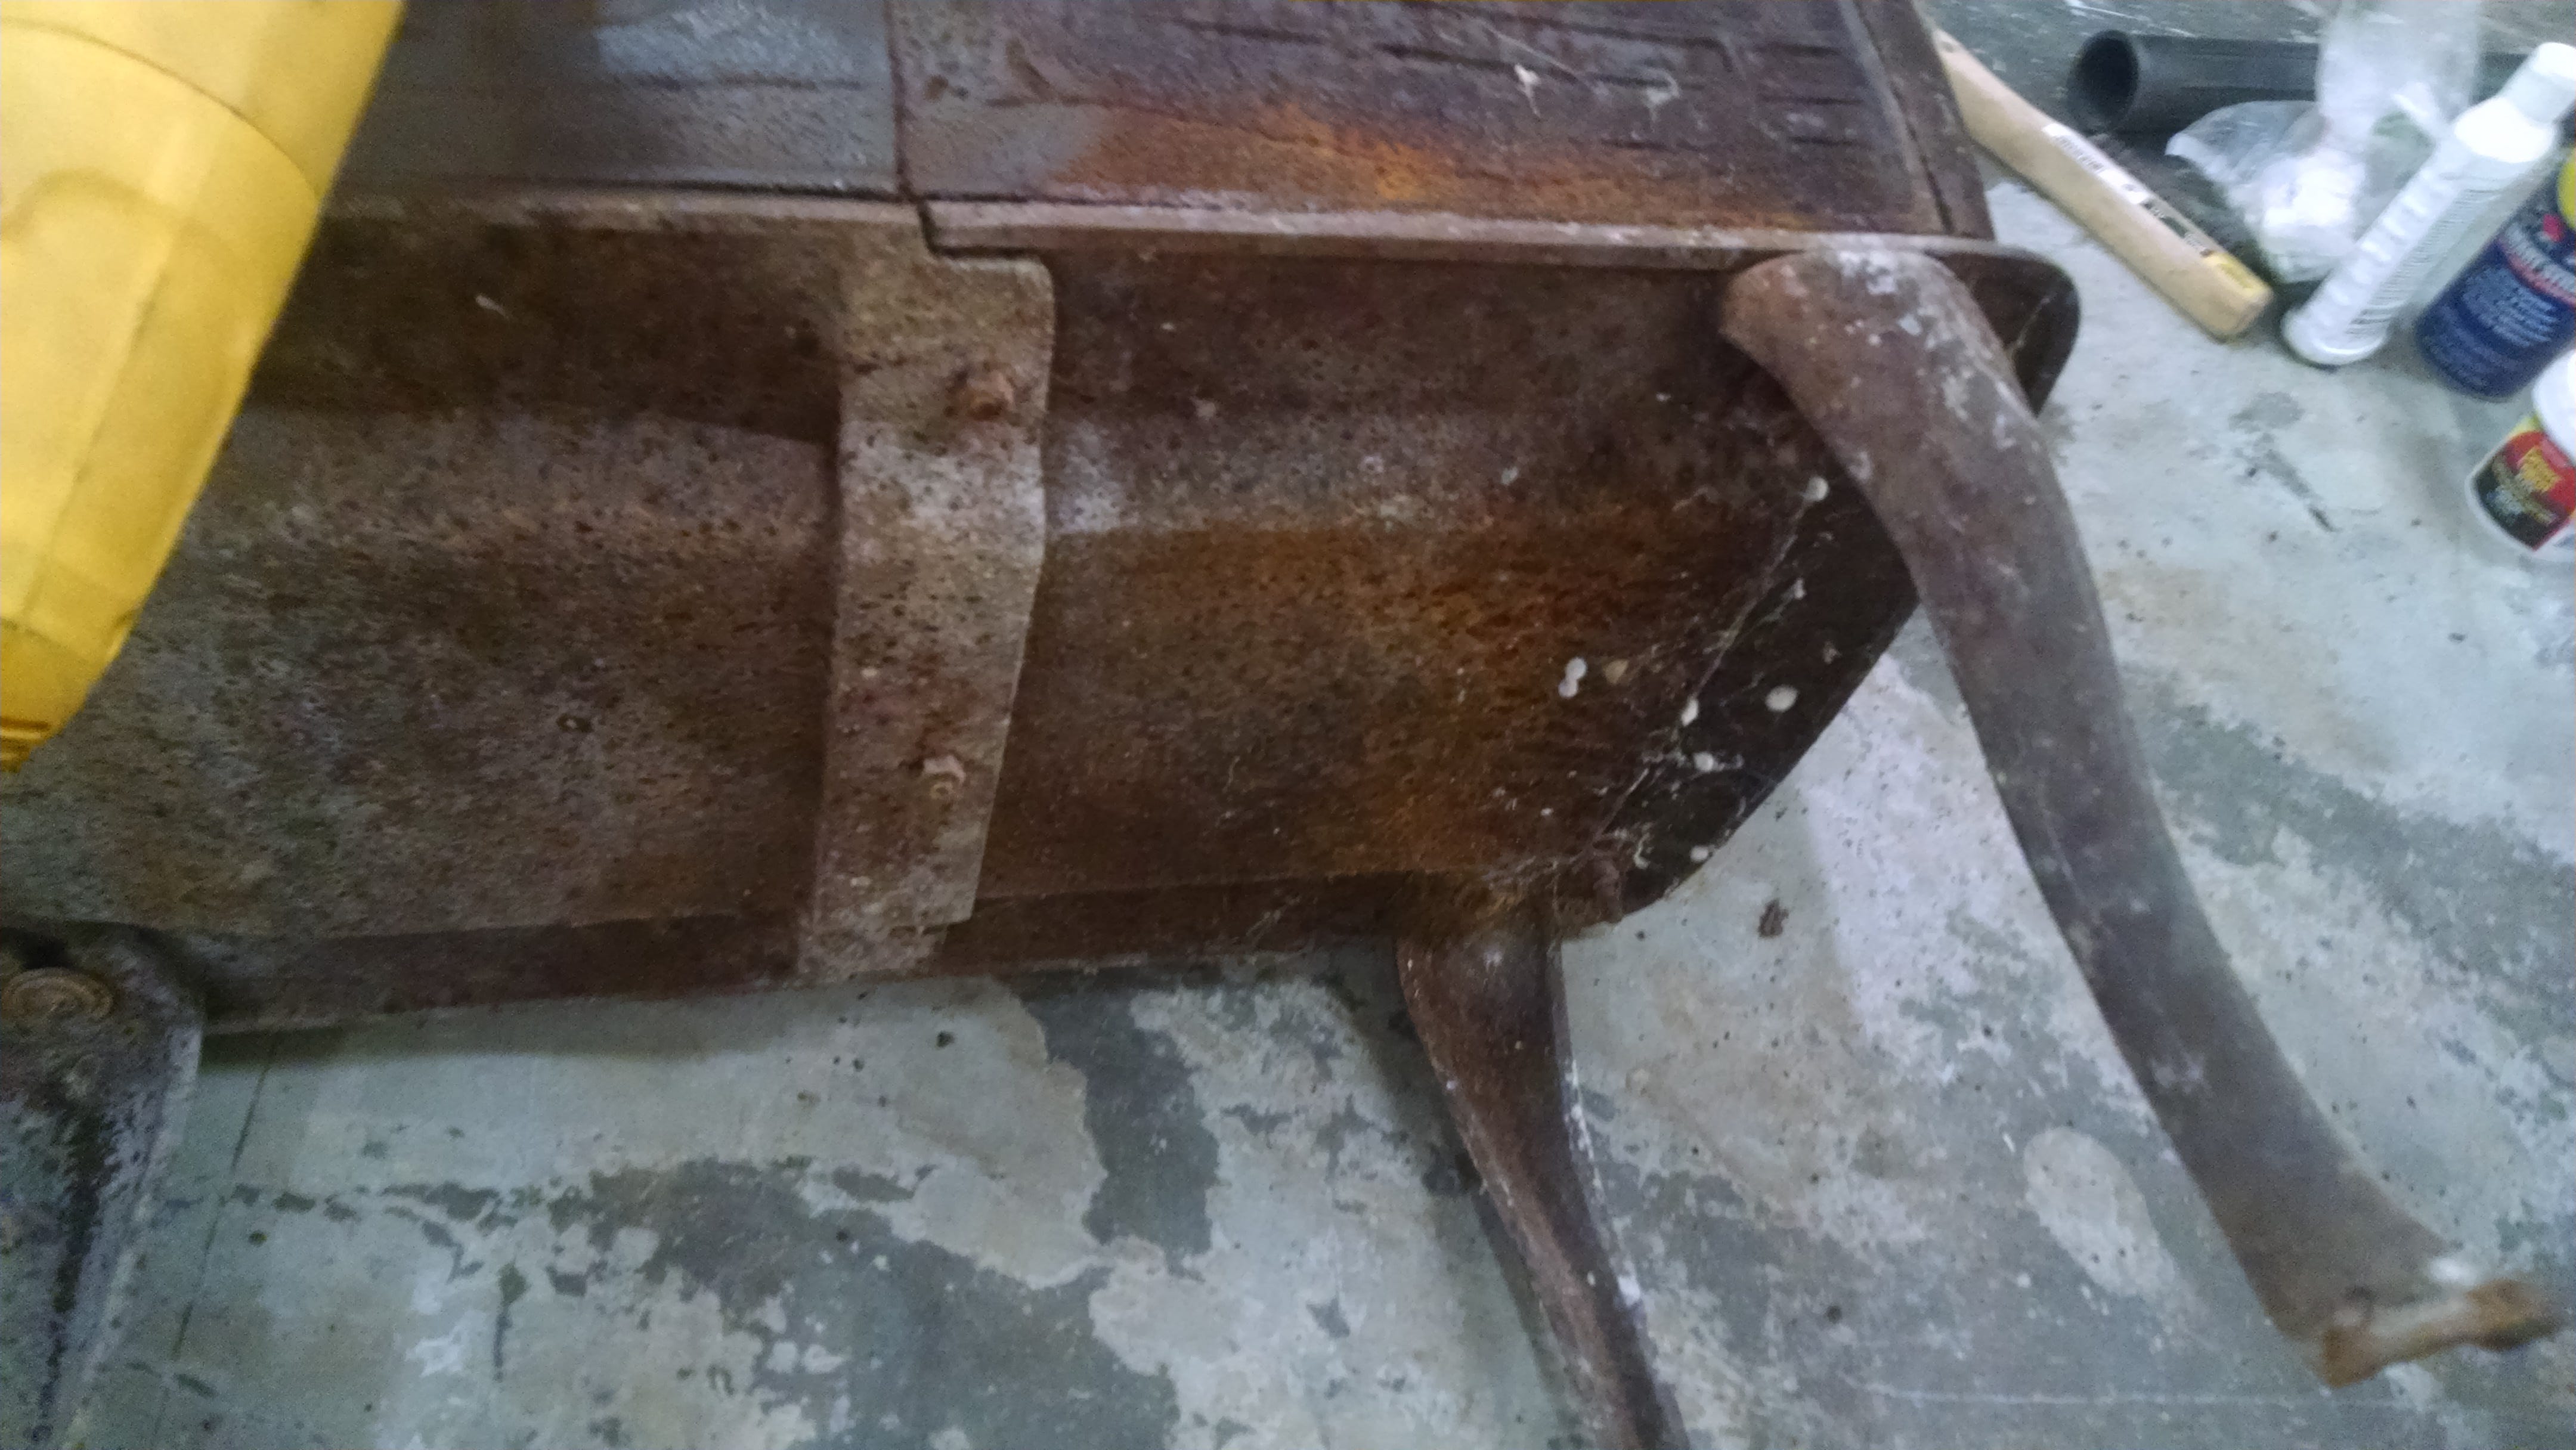
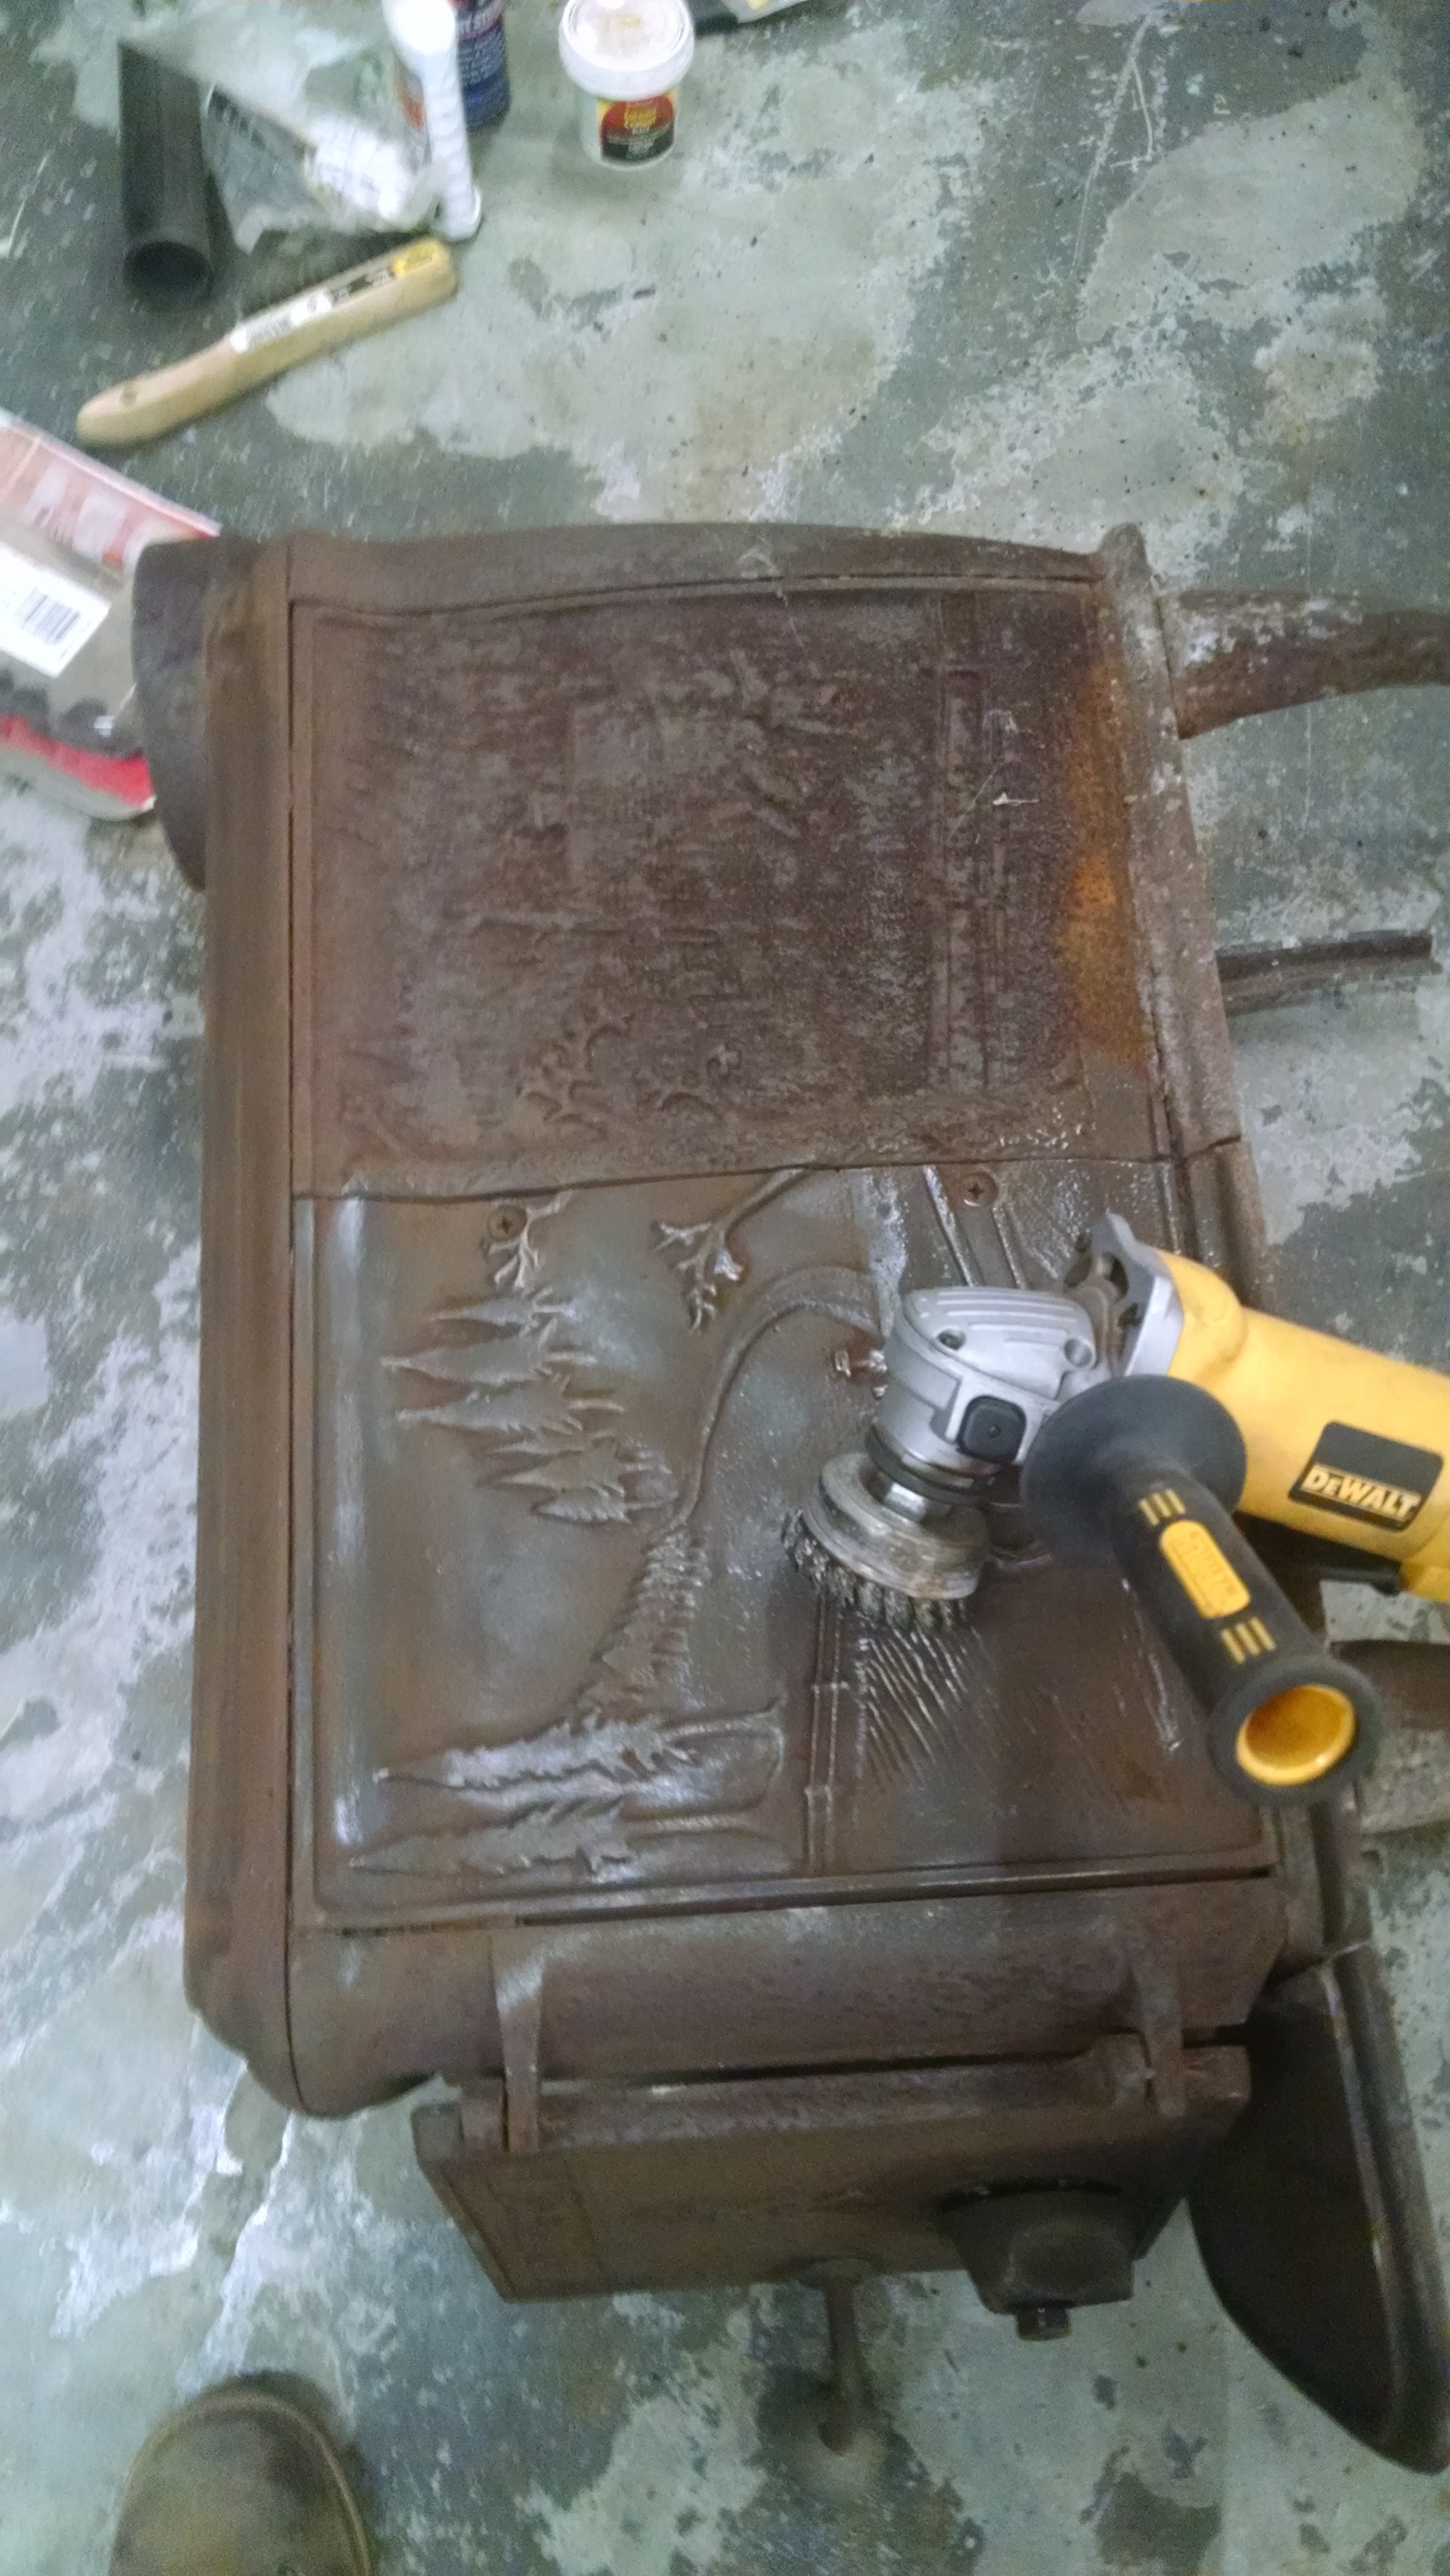
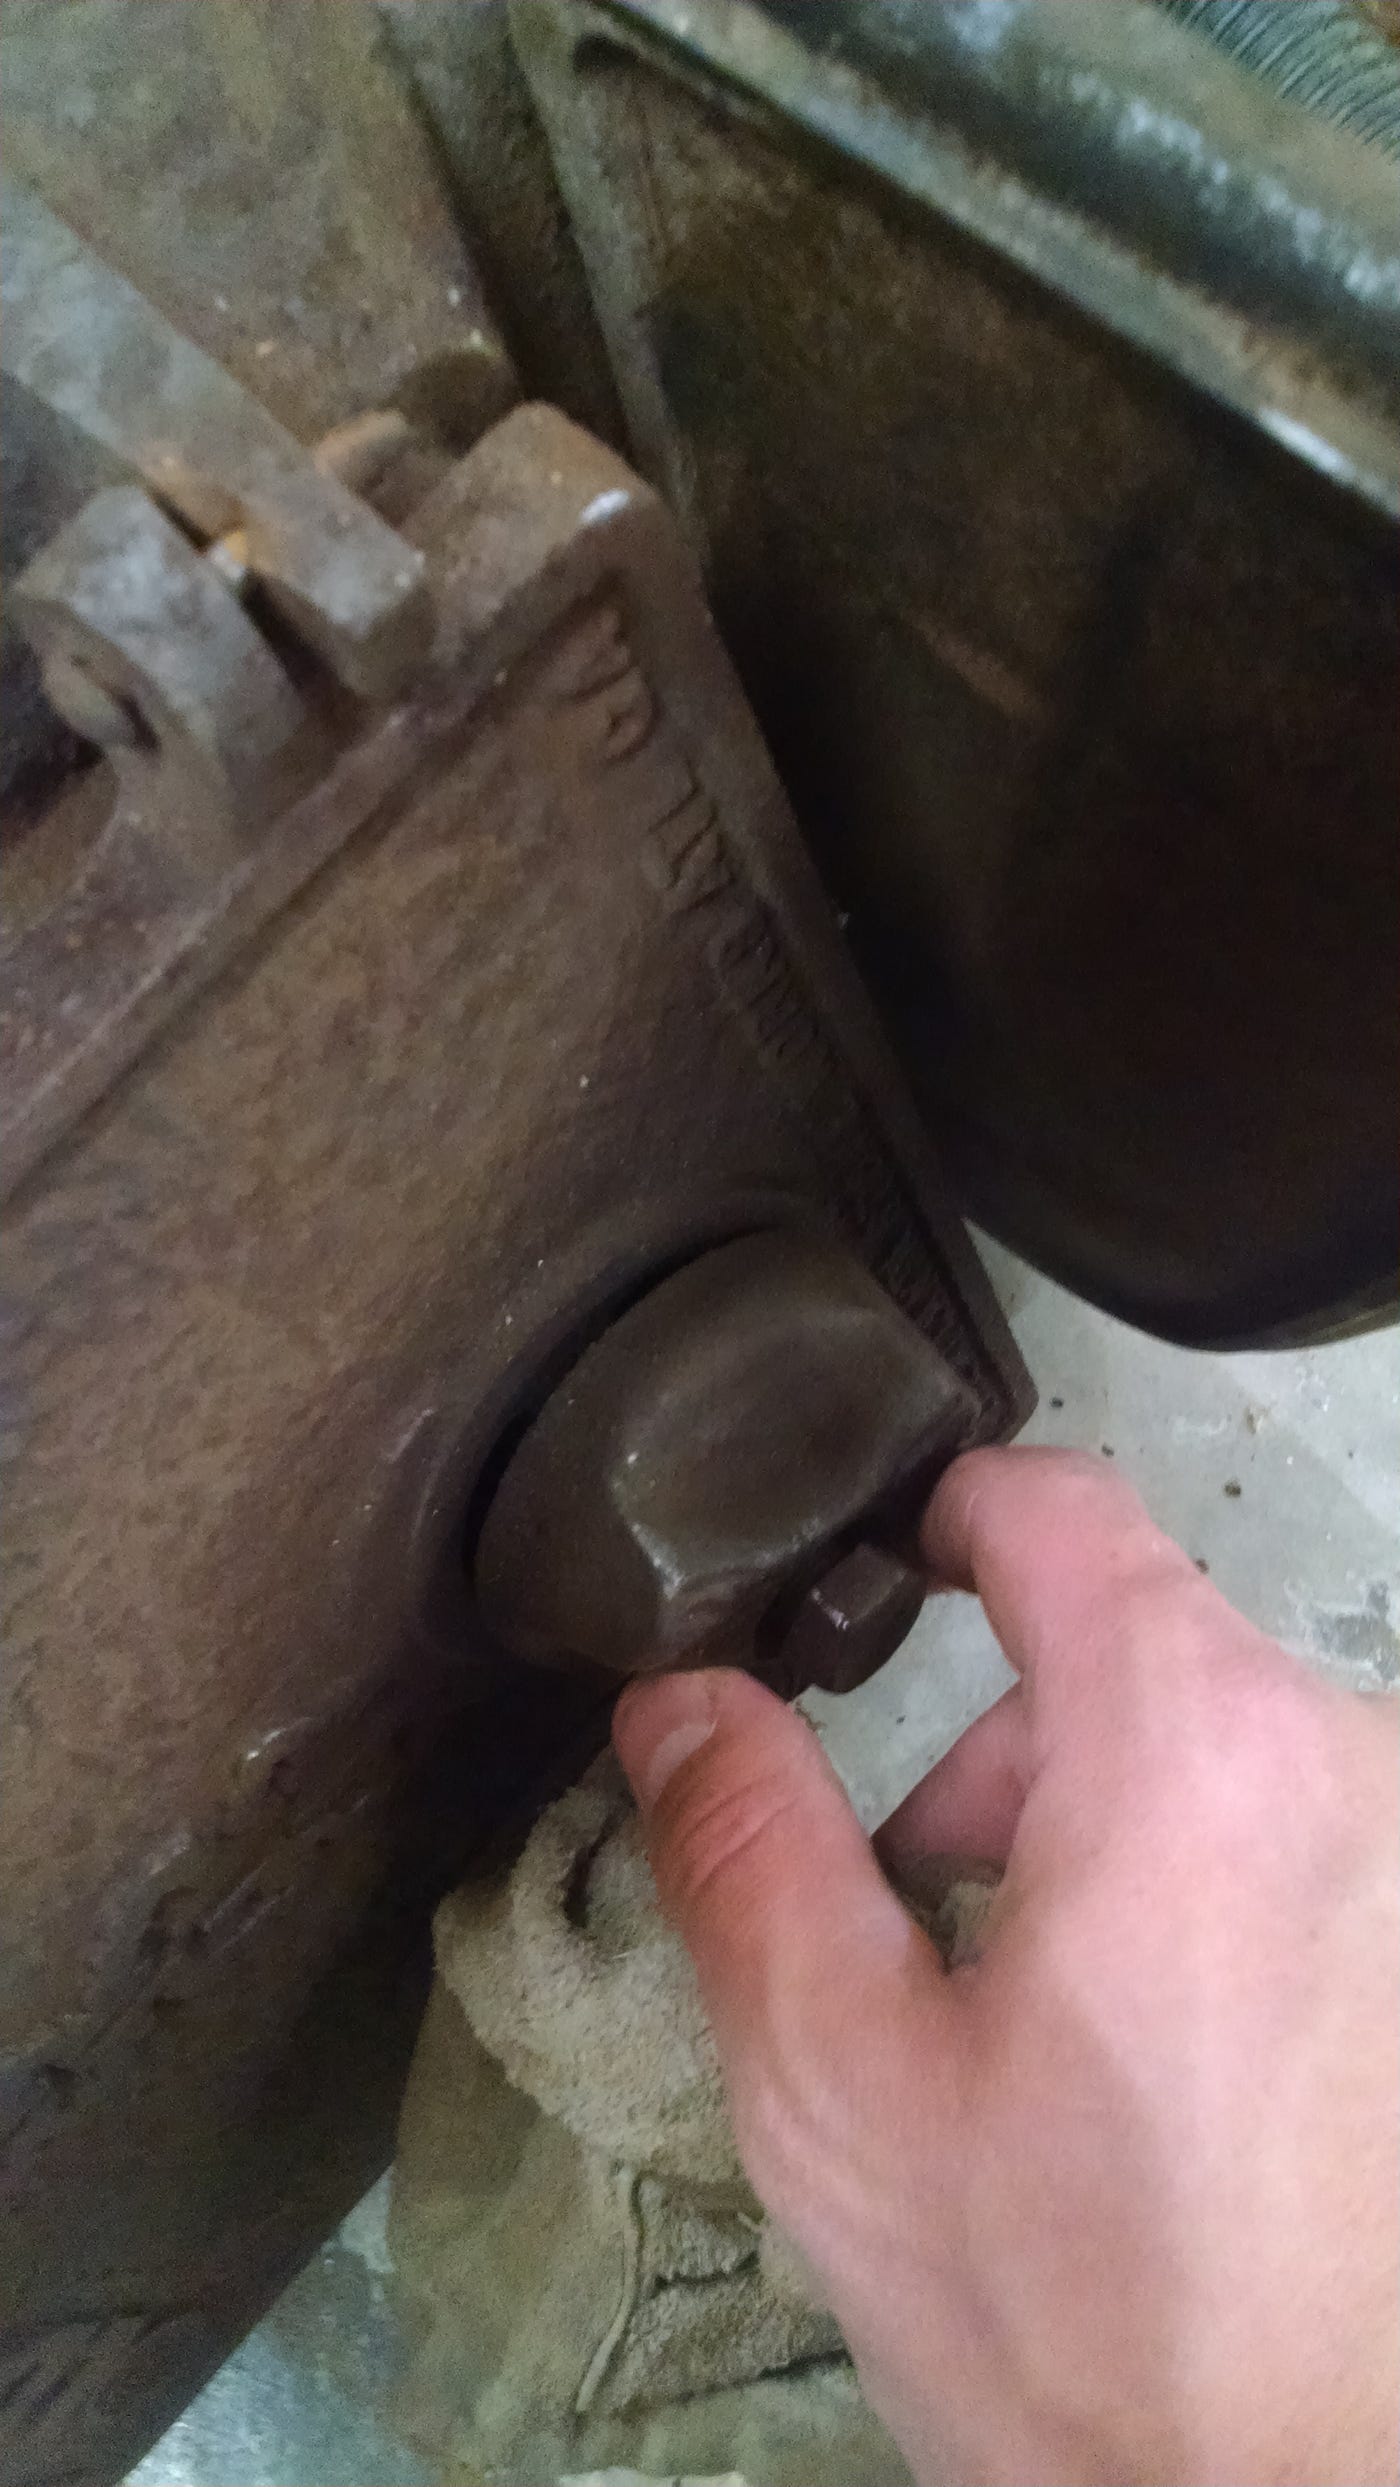
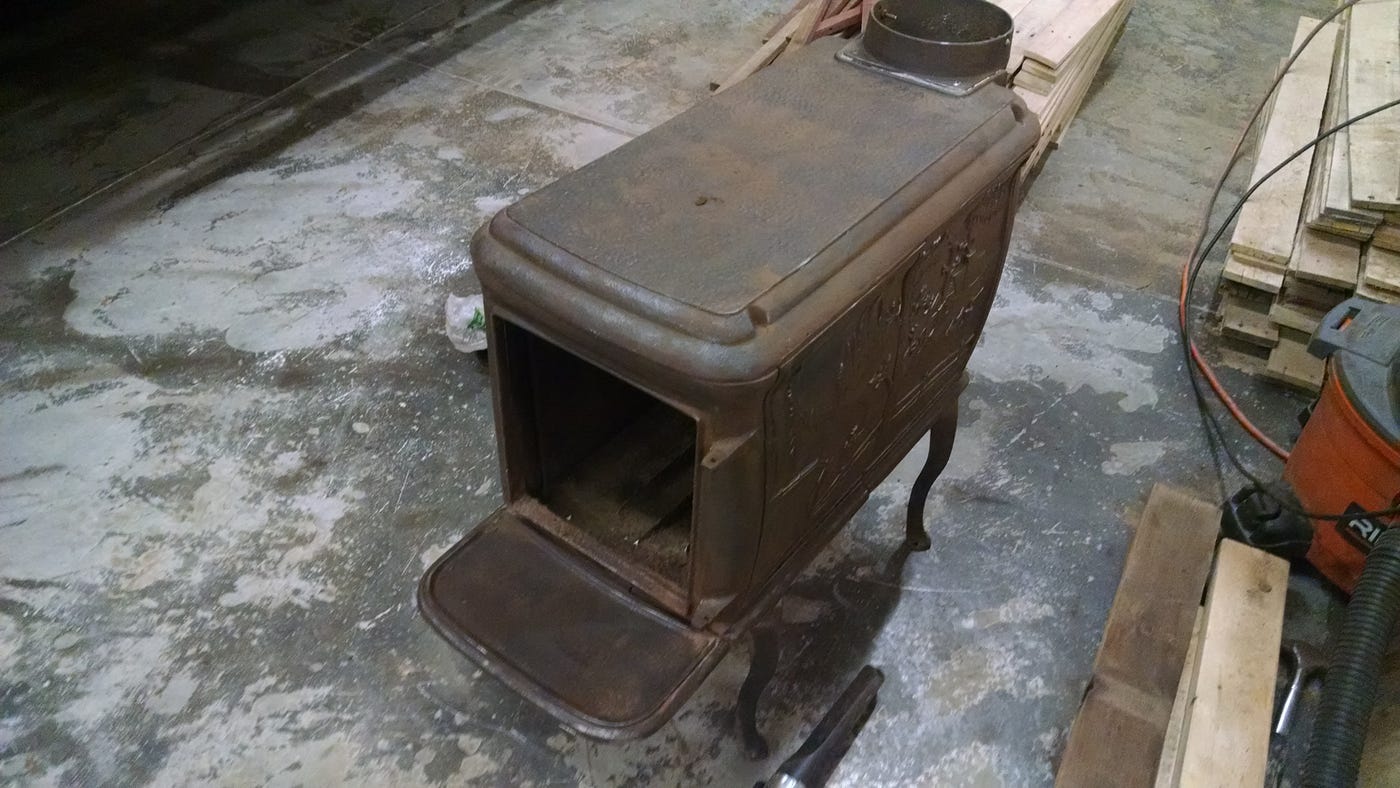
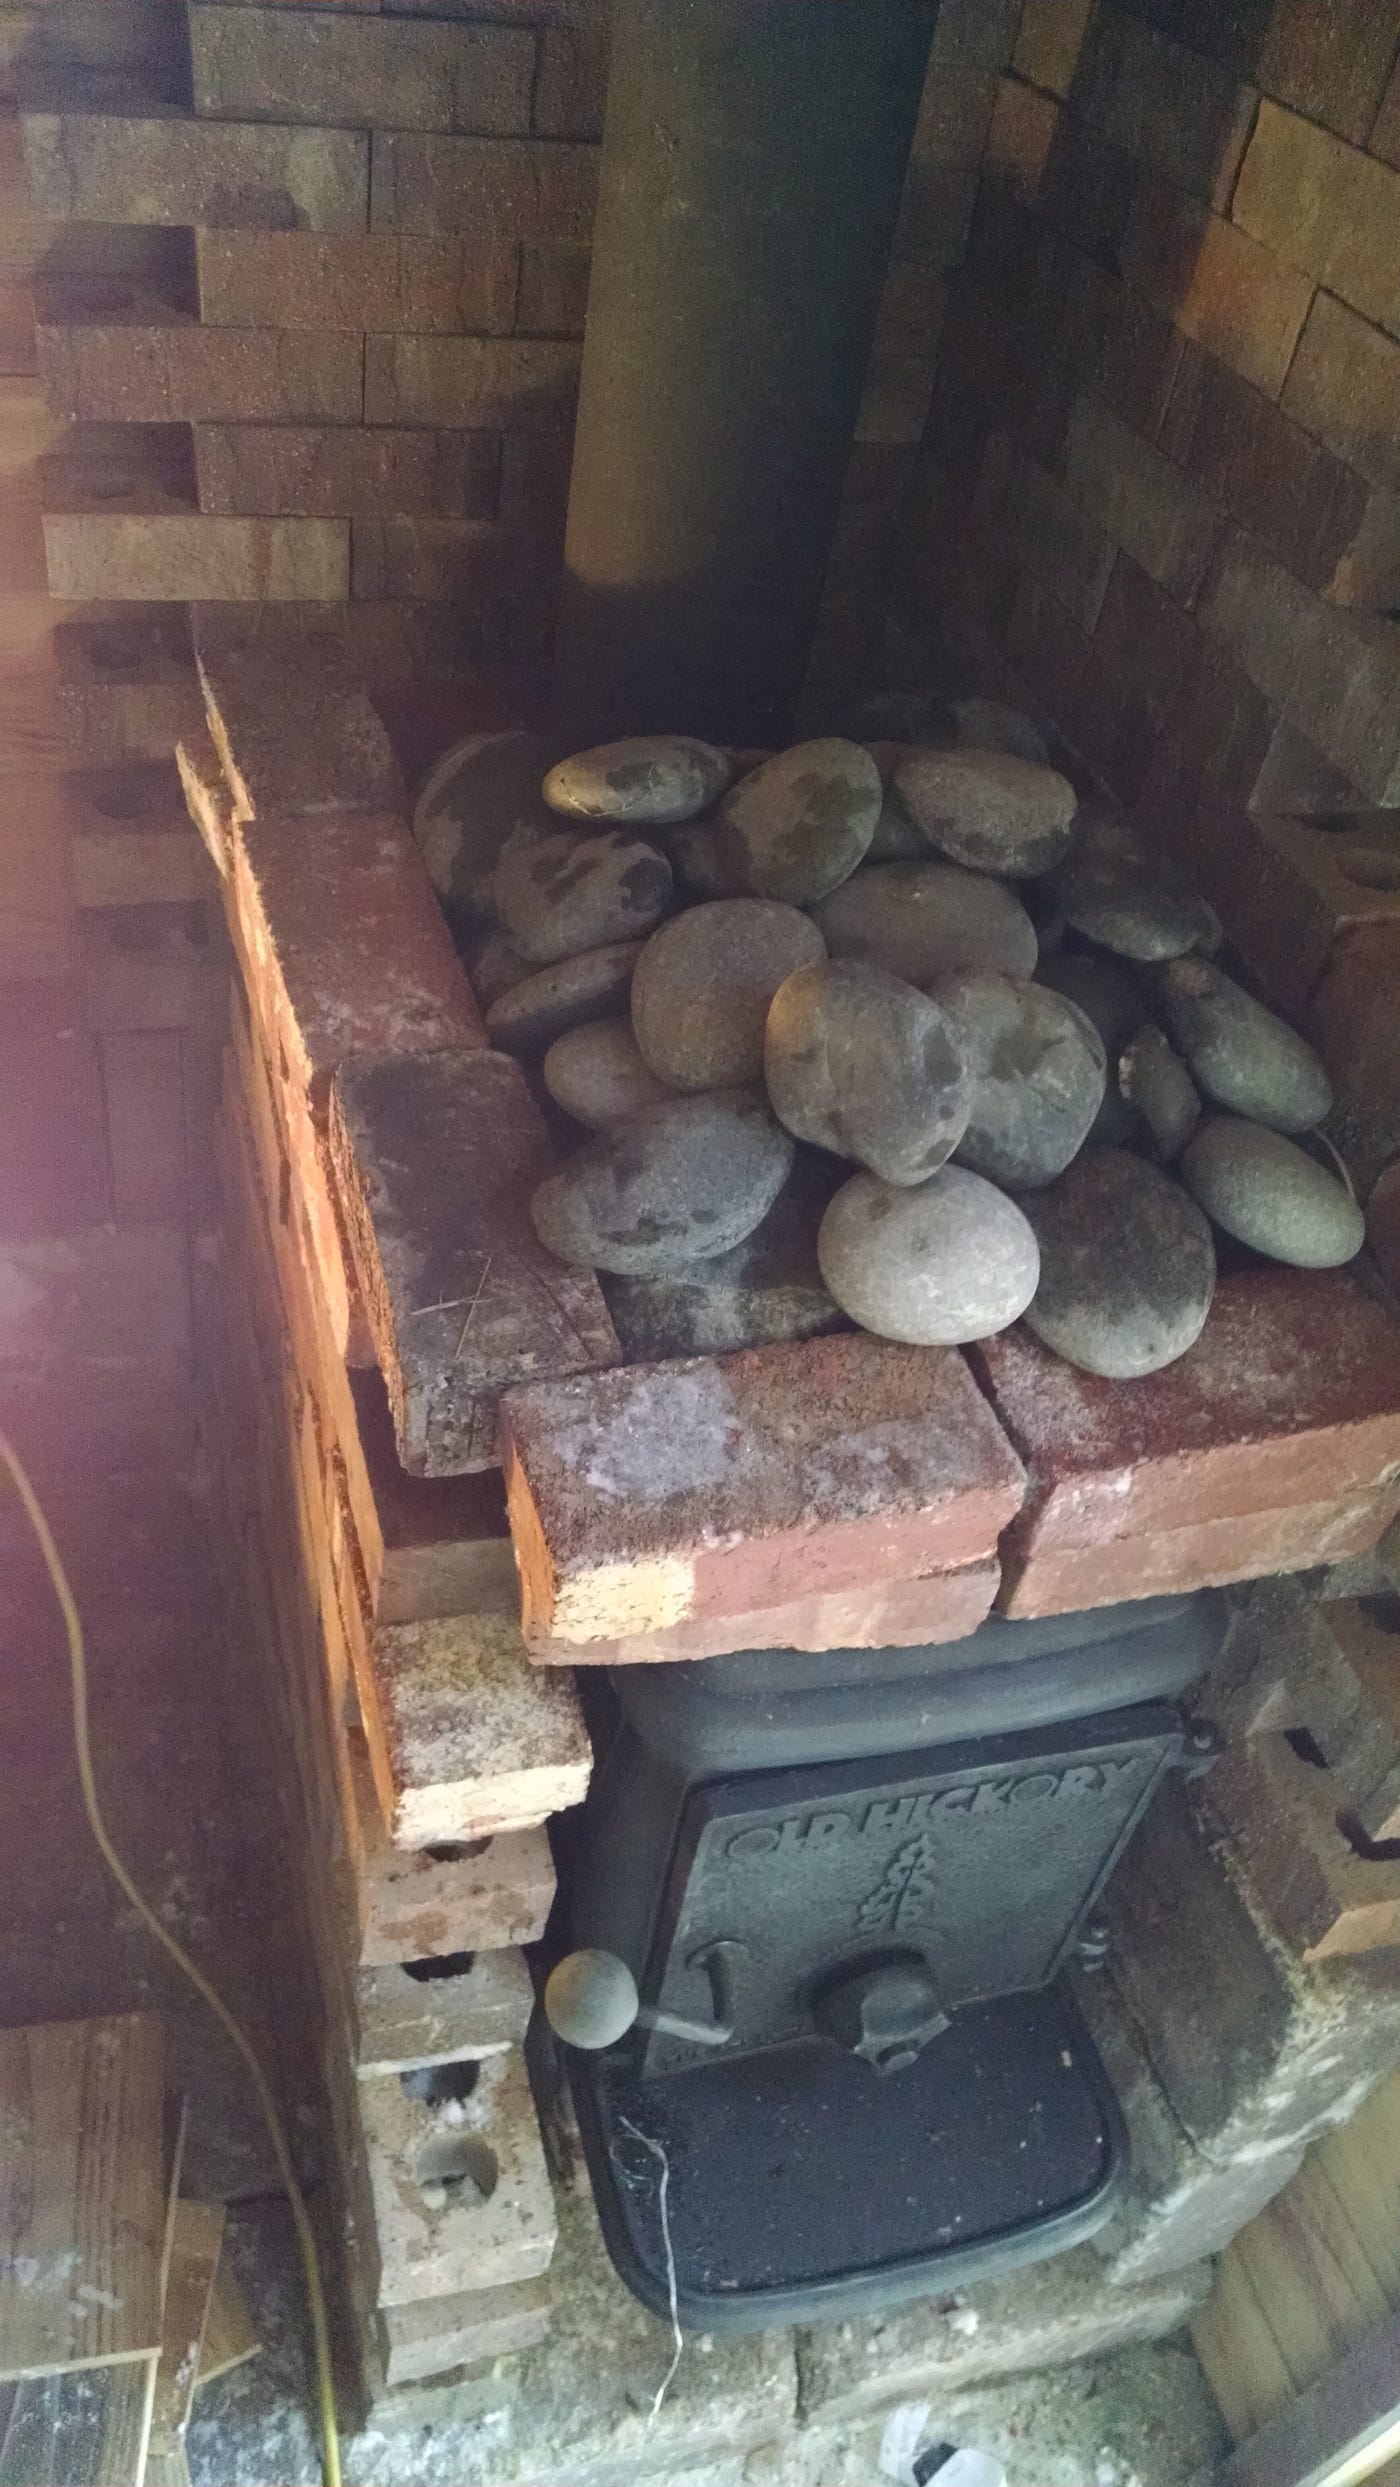
The stove was in rough shape when I got it, but after a couple hours of work, I cleaned up the rust, filled the cracks, applied new stove polish, and put in a new door seal. The stove seems inefficient but still heats fairly well. I used large pavers underneath it, a layer of bricks on three sides, and bricks up the walls to the ceiling next to the chimney. When it gets too hot, it’s tough to cool down, even with the door wide open. Initially, I wanted to buy a Kuuma stove that I would be able to keep for many years. But it didn’t really fit with the reclaimed materials spirit, or my budget for this “temporary” sauna. I figure I will appreciate a better stove that much more when I get it.
Heating the Sauna
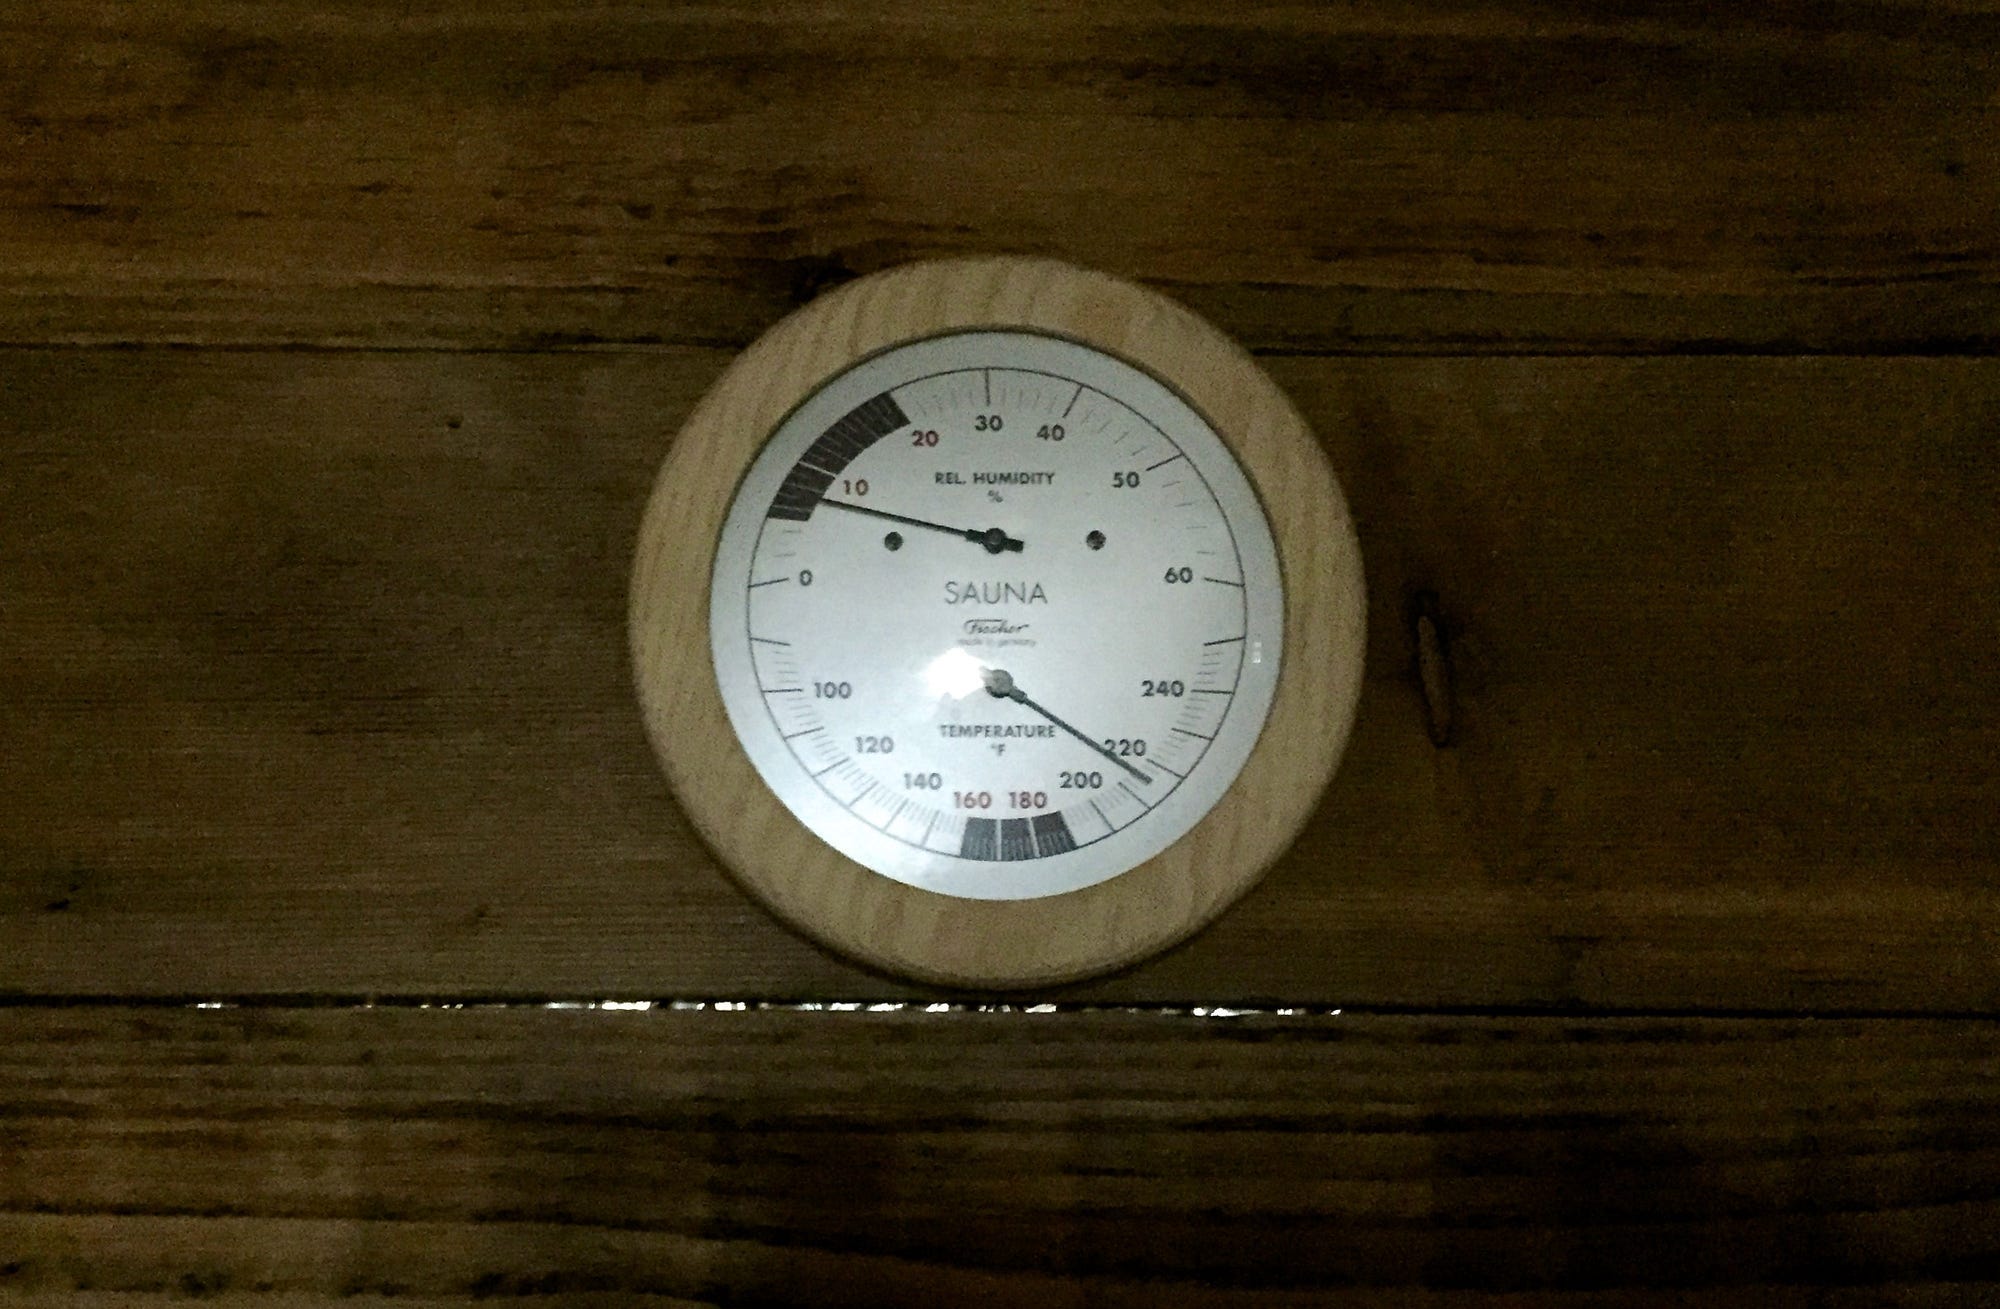
At the coldest point this winter here in Kansas City (9°F), it took about 45 minutes to heat to 170°F. In 50°F weather, it takes about 20 minutes. It holds heat like crazy due to the large amount of bricks (about 1500 lbs) and stones (130 lbs). The bricks also serve as an additional layer of fire protection. The stove has a layer of bricks on four of the six sides, leaving the top open for rocks and the front for the door. There is also a layer along two sides of the wall which goes nearly to the ceiling. The door can be open for several minutes without a significant temperature drop. This can be troublesome if I put in too much wood and the temperature is at 215°F.

I’ve had a real learning curve to figure out the stove management. In cold weather, it takes about two fireboxes full of wood to heat the sauna. In warm weather, it takes just a smidge more than one load. All of the unusable scraps I’ve collected over four months make-up my firewood pile of about two cords. I will have another cord’s worth after I finish some other reclaimed wood projects.

The wood heat is utterly fantastic compared to the electric heat of my old sauna or gym saunas.
I finished the build during a very cold snap. The first time I heated the sauna, I left it at over 230°F for a few hours without issues. Since the cedar panels had come from an outdoor fence, it was pretty well weathered, but a little warping occurred on the first heating. I pounded the panels back into place and it was good to go. I didn’t have the ability to cut them as a tongue and groove. Like EVERY other piece of reclaimed wood in the project, the cedar panels were warped and of inconsistent widths when I got them. So I ripped the edges of each piece to straighten them, make them even widths, and add a 5° bevel edge. I briefly considered trying to shiplap the boards, but they weren’t straight or even enough to do so. The bevel covers most, but not quite all, of the gaps.
The wood heat is completely different than the electric heat. There is no harshness to it at all. I have noticed that I prefer a somewhat higher temperature with the wood heat. It is difficult to overestimate the difference in heat quality. 210°F of radiant wood heat is more tolerable than 180°F of electric. Also, the steam is much better too. The stones can take as much water as you want to give them. It all goes to steam and the sound and duration are just wonderful.
My Sauna Practice
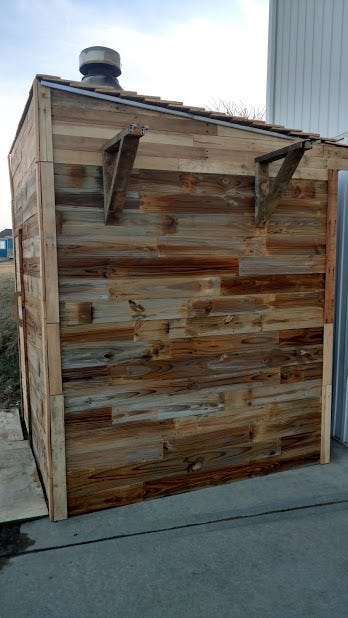
My sauna habits have evolved over time. The first couple years, I was very consistently a three round sauna-goer. I also used to read in the sauna, but no more on either count. After I had moved away from the first one I built, I had less opportunities to go to the sauna, so I tried to make the limited opportunities last. A sauna of less than 90 minutes feels too short. On the weekends, I often go for 2–3 hours. I’m in the hot room as long as I feel comfortable, then out to cool down as long as it takes to be comfortable again. Trying to stretch things does not seem to make a lot of sense to me. Comfort should always be a guide when in the hot room and when cooling down. Go back and forth as many times as you like. And bring water, LOTS of water. In Georgia, I had access to a pool for cold plunging. It was very brisk in the winter, but felt amazing. I do not have a pool or pond available for plunging here in Kansas. In the interest of cool rinsing, I have added hangers to one side of this sauna for outdoor solar showers (see photo below).


I have developed the habit of the enjoying the first cooling session in open air, and the second in water (in the form of a pool or shower). I have a pond nearby, but it’s not conducive for taking a cooling sauna dip. That first time in the water from the hot room is the most startling by far. Just stay in until you can breathe normally. I went from three rounds to as many as six or seven rounds. The relaxation becomes epic and wonderful. By far the best feeling of the session is always the endorphin rush that comes after the first watery cool down when coming back into the hot room and dumping water on the rocks again.
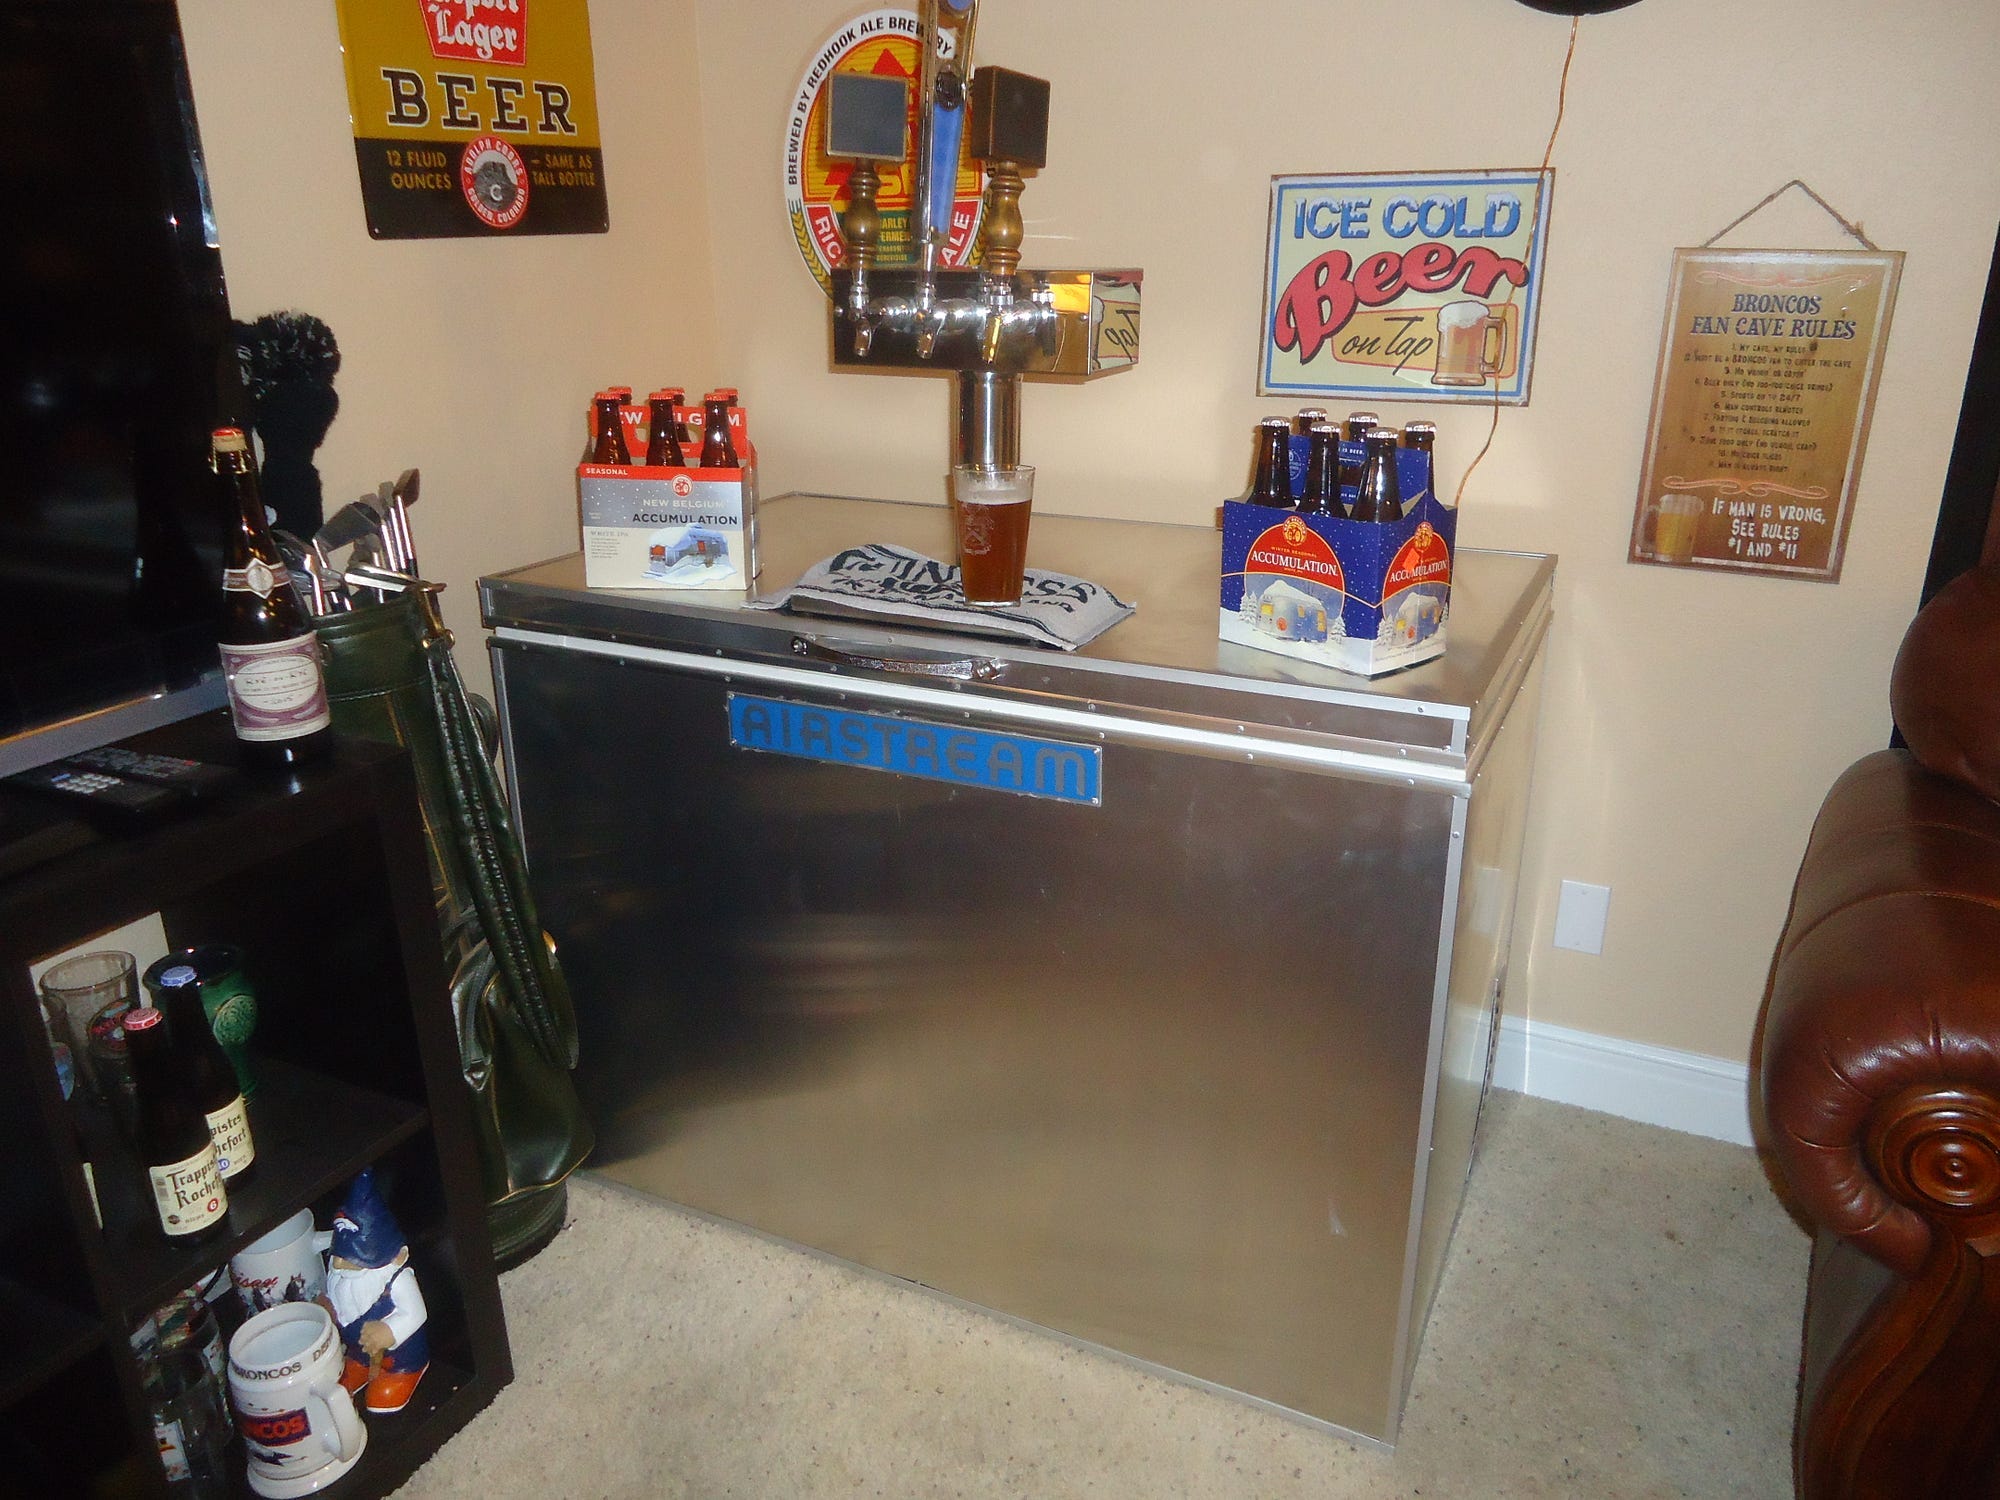
I drink a lot of water in the hot room, usually 3–5 quarts of ice water. I recently started adding a little apple cider vinegar and lemon slices. The slight astringency and sourness really go down well with the cool water. I usually start or finish the sauna with a beer. I make my own, and have a kegerator I built handy at all times.
Family, Finishing Touches, and the Kegerator
I am happy with this sauna, and my wife has taken it to it very enthusiastically due to the softness of the wood heat. I have two sons, and they both use it. Part of the reason I wanted to get this done and in use was for health reasons: to relax muscles, clean ourselves, and sweat out some toxins. Also, I sleep like a rock afterward.
It will continue to be a work in progress, always making little changes and updates. I am not liking the way the solar light is working. I had some leftover Thompson’s Water Seal left over from another project, and applied it unevenly and it splotched. There is also some ongoing maintenance to keep the stove going and the duckboard clean.
I would love to try a dedicated public sauna, but I haven’t found any in the Kansas City area. I was somewhat disappointed when the Finnish Traveling Sauna cancelled its visit to Kansas City.
And finally, a picture of my kegerator, because it’s cool, it’s been published (in Brew Your Own Magazine). It supplies beer before and after the sauna session.